Disappearing four-patch: four squares, four cuts and a block that looks much harder than it is
🖨️ Prefer to sew from paper? Printable PDF patterns are in our Etsy shop ↗
Sew a plain four-patch, make four straight cuts, turn four pieces and a whole new block appears. Step-by-step drawings, exact sizes and a 20-inch pillow idea.
Complete guide · No signup required
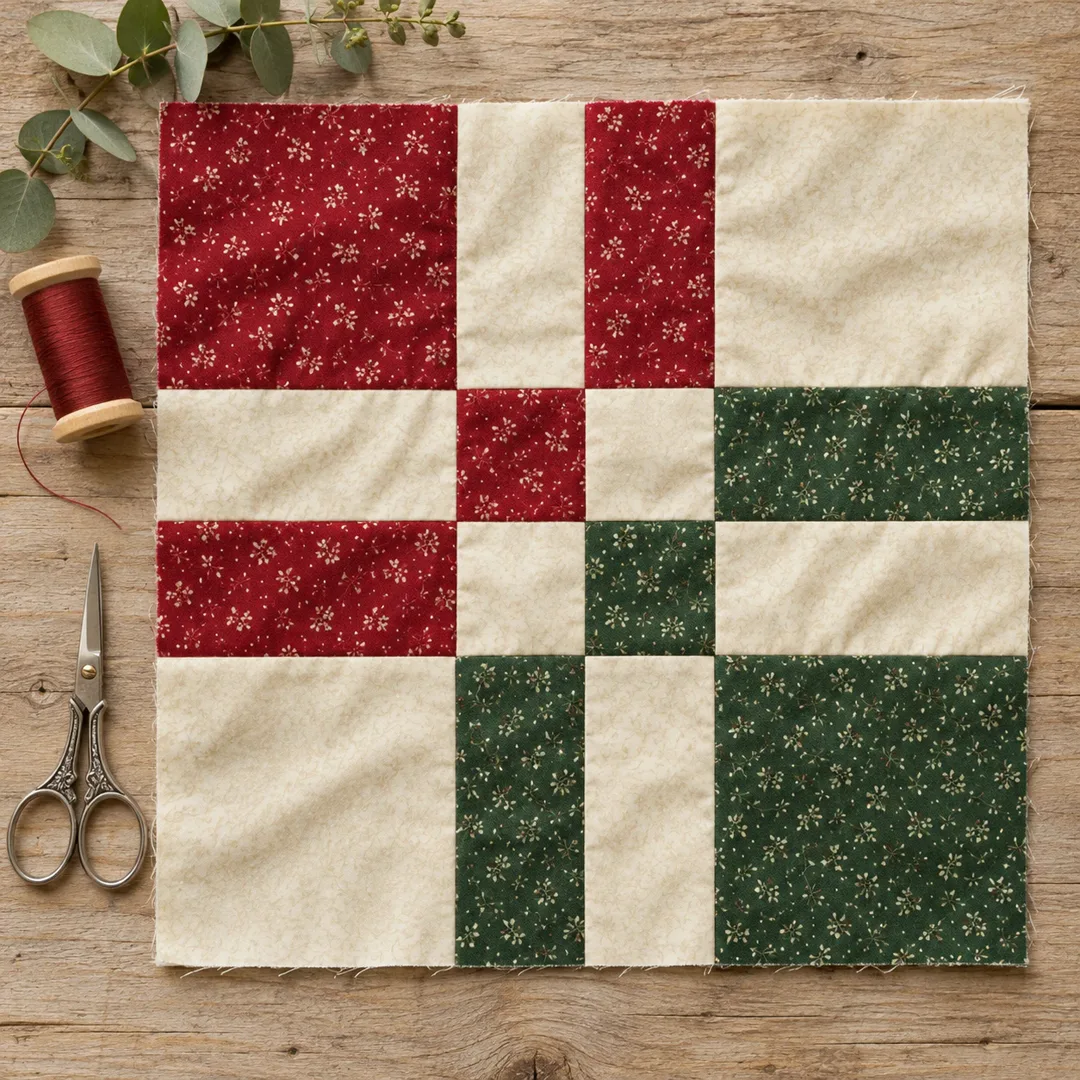
Where did the four-patch go?
This block starts as the simplest one there is: four squares sewn together. Four straight cuts and a few turns later, you have a block with big corners, little strips and a tiny four-patch in the middle. Nobody will guess it began as four squares.
It is a traditional technique called the disappearing four-patch. It is a wonderful first project, a great way to use up charm squares, and it looks lovely in Christmas red and green or in any two colors you love.
Sizes at a glance
All sizes include ¼-inch seam allowances.
| Stage | Size |
|---|---|
| Starting squares | 4 squares, 5 × 5 in (1 red, 1 green, 2 cream) |
| Four-patch | 9½ × 9½ in |
| Corner pieces | 4 squares, 3¼ × 3¼ in |
| Side pieces | 4 rectangles, 3 × 3¼ in |
| Center four-patch | 1 square, 3 × 3 in |
| Block | 8½ × 8½ in (8 in finished) |
| Pillow (4 blocks + border) | 20 × 20 in finished |
Step 1: Cut four squares
Cut one red, one green and two cream squares, all 5 inches. Five-inch charm squares work perfectly, so a charm pack is an easy way to start.
Step 2: Sew the four-patch
Place the red and green on one diagonal and the two creams on the other.
- Sew the red to a cream and the other cream to the green.
- Press the two seams in opposite directions.
- Join the two pairs, nesting the center seam so the four corners meet in one point.
Step 3: Make four straight cuts
Measure 1½ inches from the center seam on each side and cut. Turn the block and do the same across the other center seam. Always measure from the seam, not from the outside edge.
You get nine pieces: four corner squares, four side pieces with two colors each and a small four-patch in the middle.
Step 4: Turn the side pieces
This is the whole trick, and it takes ten seconds.
- Give each of the four side pieces a half turn, so it is upside down in the same spot.
- Leave the four corners and the center four-patch exactly where they are.
- Check the layout against the drawing before you pick anything up.
Step 5: Sew the block
Sew the nine pieces back together in their new positions.
- Sew each row of three. Press the seams of the middle row in the opposite direction from the top and bottom rows.
- Join the rows, nesting the seams and pinning where they meet.
Make it a 20-inch Christmas pillow
Make four blocks and sew them in two rows of two. The center measures 16½ inches (16 inches finished). Turn the blocks before you sew: the big red and green corners make different designs depending on which way each block faces.
For the border, cut two green strips 2½ × 16½ inches for the sides and two strips 2½ × 20½ inches for the top and bottom. Sew the sides first, then the top and bottom. The cover finishes at 20 inches, ready for a 20-inch pillow form. A ⅓ yard of fabric is enough for the border.
Make a 46 × 54-inch throw quilt
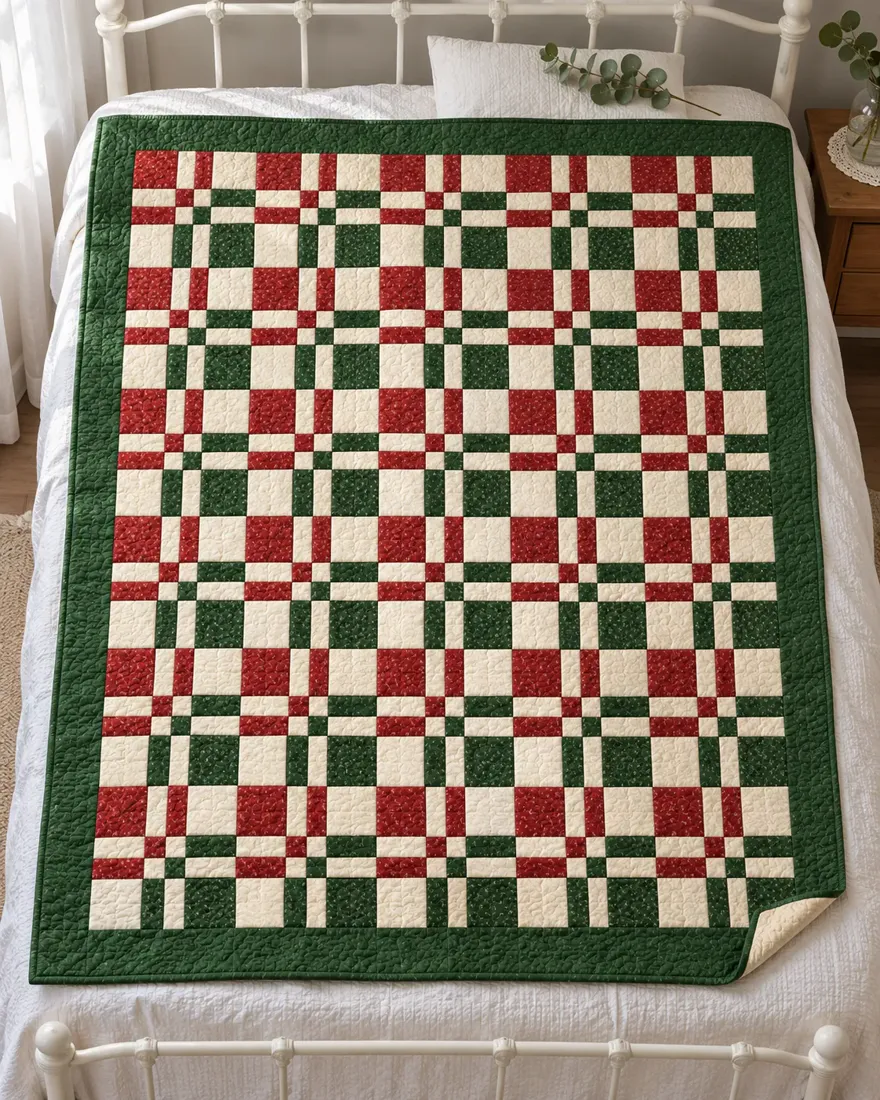
Thirty blocks, five across and six down, make a cozy throw. Lay them out first and turn a few if you like a different look, then sew them in rows of five, pressing the seams of every other row in the opposite direction so they nest. The center measures 40½ × 48½ inches (40 × 48 inches finished).
For the border, cut five green strips 3½ inches wide. Sew the side borders first (two strips 3½ × 48½ inches, joined if needed), then the top and bottom (two strips 3½ × 46½ inches). The quilt finishes at 46 × 54 inches.
| Fabric (at least 42 in wide) | Amount | Used for |
|---|---|---|
| Red | ⅔ yard | 30 squares 5 in (4 strips 5 in wide, 8 squares each) |
| Green | ⅔ yard | 30 squares 5 in |
| Cream | 1¼ yards | 60 squares 5 in (8 strips) |
| Green for border | ⅝ yard | 5 strips 3½ in |
| Binding | ½ yard | 6 strips 2½ in (about 212 in) |
| Backing | 3¼ yards | pieced to about 54 × 62 in |
| Batting | 1 piece | about 54 × 62 in |
Fixing common problems
Almost every problem in this block comes from where you measure and from the seam allowance.
- Strips of different widths: measure the cuts from the center seams, not from the outer edge.
- Center four-patch off center: the center seam was not nested in step 2. Unpick the last seam and nest it before cutting.
- Block smaller than 8½ inches: your seams are a little wide. Sew a test seam and adjust.
- Pieces turned the wrong way: only the four side pieces turn. The corners and the center never move.
- Seams that will not nest: press each row in the opposite direction from the row next to it.
Final thoughts
Make one block to see the magic, then make a stack in your favorite colors: blue and cream, scrappy prints or a mix of florals all work beautifully. Want more cozy projects with every measurement worked out? Our printable PDF patterns are waiting in our Etsy shop, and our free guides are always here.