Blue Meadow
Star Quilt
🖨️ Prefer to sew from paper? Printable PDF patterns are in our Etsy shop ↗
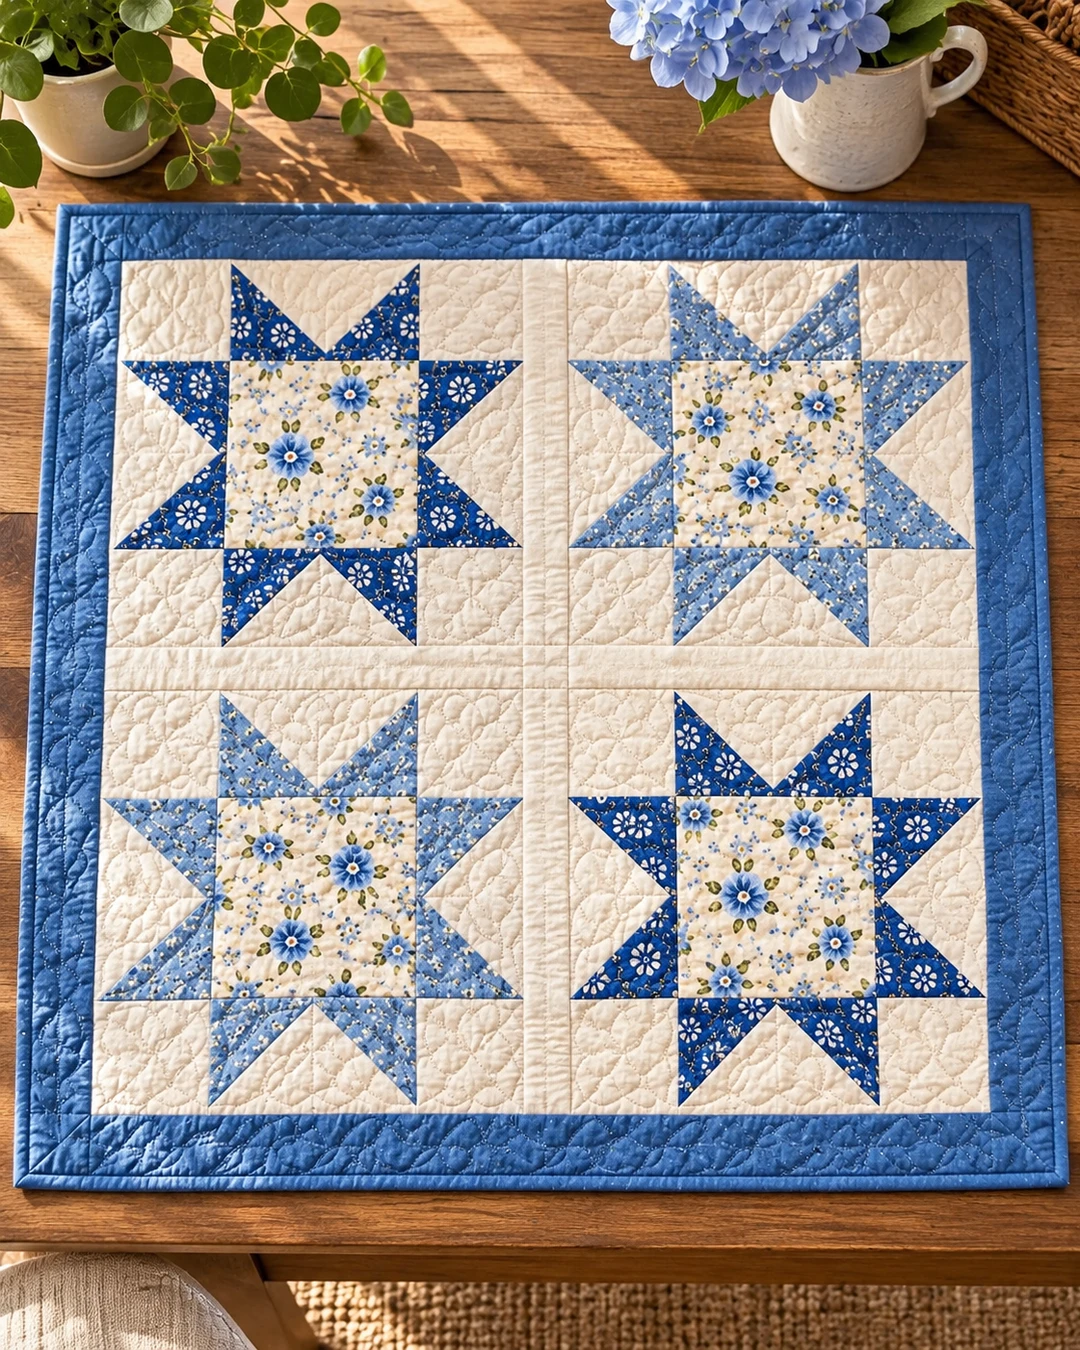
Four blue sawtooth stars, floral centers and cream sashing make a cheerful 40-inch wall quilt or table topper. Download the complete nine-page pattern free.
- Finished size
- Approximately 40 × 40 in
- Skill level
- Confident beginner
- Seam allowance
- 1/4 in, included in all cuts
Free direct download. No email or purchase required.
Digitally reviewed November 11, 2026. Not physically sewn or maker-tested. Sew one test star before cutting all fabric. Yardage and finished size are estimates.
Materials & tools
- Cream background: about 1 1/4 yd. Blue floral centers: 1/3 yd. Deep blue: 1/2 yd. Soft blue: 1/2 yd. Blue outer border: 1/2 yd. Binding: 1/2 yd. Estimates assume 42 in usable width.
- Backing and batting: at least 44 x 44 in each; a typical 42-in-wide backing needs piecing. Check the overage required by your quilting method.
- Thread, rotary cutter, quilting ruler, cutting mat, marking pencil, pins or clips, iron and sewing machine.
Cutting list
All dimensions include a 1/4-in seam allowance. Keep the blue shades separate. Each block uses eight blue squares; make two blocks in each shade. Measure the quilt center before final border cutting.
| Fabric / piece | Quantity | Cut size |
|---|---|---|
| Floral center | 4 | 8 1/2 x 8 1/2 in |
| Cream star corners | 16 | 4 1/2 x 4 1/2 in |
| Cream flying-geese bases | 16 | 8 1/2 x 4 1/2 in |
| Deep blue point squares | 16 | 4 1/2 x 4 1/2 in |
| Soft blue point squares | 16 | 4 1/2 x 4 1/2 in |
| Cream vertical sashing | 2 | 2 1/2 x 16 1/2 in |
| Cream middle sashing | 1 | 2 1/2 x 34 1/2 in |
| Blue top/bottom borders | 2 | 3 1/2 x 34 1/2 in |
| Blue side borders | 2 | 3 1/2 x 40 1/2 in |
Plan your four-star layout
The sashed center is 34 1/2 × 34 1/2 in unfinished. Add the top and bottom borders first, then the side borders. The completed top is 40 1/2 × 40 1/2 in before quilting and binding.
Make the flying geese
You need 16 flying-geese units, each 8 1/2 x 4 1/2 in unfinished: eight deep blue and eight soft blue.
1. Lay one 4 1/2-in blue square right sides together on one end of an 8 1/2 x 4 1/2-in cream rectangle, aligning its outside edges.
2. Draw a diagonal across the blue square from the top outside corner to the bottom inside corner (left end). Stitch directly on the drawn line. The part that remains after flipping should be the outer blue corner.
3. Before trimming, flip the blue corner outward to check that it fully covers the rectangle corner without distortion. Open it again.
4. Trim away the excess layers 1/4 in outside the seam, toward the outer rectangle corner. Press the blue triangle open.
5. Repeat on the other rectangle end using another blue square. Its diagonal mirrors the first one (top outside to bottom inside on the right end).
6. Check: the cream point should sit 1/4 in above the long raw edge, centered. That 1/4 in keeps the point sharp after sewing.
Stop-and-check: Keep the unit 8 1/2 x 4 1/2 in. Do not cut across the finished blue triangle. Make one sample before batch sewing.
Assemble a star block
Each star block has a 3-row layout: corner / goose / corner; goose / floral center / goose; corner / goose / corner. The two blue triangles on each goose unit form the outward star points. Cream triangles point inward toward the floral center. Blue triangles form the eight star points.
1. Top row: cream 4 1/2-in corner, 8 1/2-in flying goose, cream 4 1/2-in corner. Place the goose so the cream triangle points toward the floral center. The blue triangles sit next to the center and their tips reach the outer edge. Sew and press outward.
2. Middle row: vertically rotated flying goose with blue tips facing left, 8 1/2-in floral square, vertically rotated flying goose with blue tips facing right. Sew and press toward center.
3. Bottom row: cream corner, flying goose, cream corner. Place the goose so the cream triangle points toward the floral center. The blue triangles sit next to the center and their tips reach the outer edge. Sew and press outward.
4. Join the three rows with 1/4-in seams, matching seams and pinning intersections. Press flat.
5. Check size: 16 1/2 x 16 1/2 in unfinished (16 x 16 in finished). Make four blocks in total.
Join blocks and sashing
1. Sew the first 2 1/2 x 16 1/2-in cream sashing strip between the two top star blocks. Press toward sashing.
2. Repeat with the bottom two stars and the second short sashing strip.
3. Measure each row: 34 1/2 x 16 1/2 in unfinished. Check that both rows have exactly the same width.
4. Place the long cream 2 1/2 x 34 1/2-in sashing strip between the two completed rows. Pin at both ends and the middle. Sew and press.
5. Check the completed center: 34 1/2 x 34 1/2 in unfinished. A finished block is 16 in, and finished sashing is 2 in.
Add the blue border
1. Sew blue 3 1/2 x 34 1/2-in border strips across top and bottom of the center. Press toward blue. Center should now be 34 1/2 x 40 1/2 in unfinished.
2. Sew blue 3 1/2 x 40 1/2-in side borders along the remaining sides. Press.
3. Check the completed quilt top: 40 1/2 x 40 1/2 in unfinished. Each blue border finishes at 3 in.
Quilt, trim & bind
Prepare the layers
1. Press the quilt top and backing. Make a quilt sandwich: backing wrong side up, batting, and quilt top right side up. Smooth without stretching.
2. Baste with curved safety pins or basting spray according to manufacturer instructions.
3. Quilt with a walking foot using gentle diagonal or straight lines. Suggested beginner option: stitch 1/4 in beside star seams, then add even lines in the cream areas.
4. After quilting, square the edges, trimming backing and batting flush with the top without cutting into seams.
Binding — double fold, 2 1/2-in strips Make approximately 185–190 in of joined continuous binding, enough for the 160-in perimeter plus corners, joining and handling allowance. Cut five 2 1/2-in x WOF strips if your usable WOF is about 40–42 in; after diagonal joins, confirm the actual usable length before attaching.
1. Join binding strips on a 45-degree diagonal. Trim join seam allowances to 1/4 in; press the long strip in half lengthwise, wrong sides together.
2. Starting several inches before one corner, sew raw edges of binding to quilt front with 1/4-in seam, leaving a free tail for joining. Miter corners.
3. Join the two tails without pulling, finish sewing, fold binding over the raw edge and stitch to the back by hand or machine.
4. Check all four corners, then wash and dry only according to fabric and batting instructions.