Sunshine & Indigo
Scrappy Brick Quilt
🖨️ Prefer to sew from paper? Printable PDF patterns are in our Etsy shop ↗
Golden yellow, soft blue and navy florals meet in simple horizontal patchwork rows.
- Finished design
- 48 × 60 in
- Construction
- 20 rows · 89 rectangles
- Seam allowance
- 1/4 in, included in cuts
No signup or purchase required.
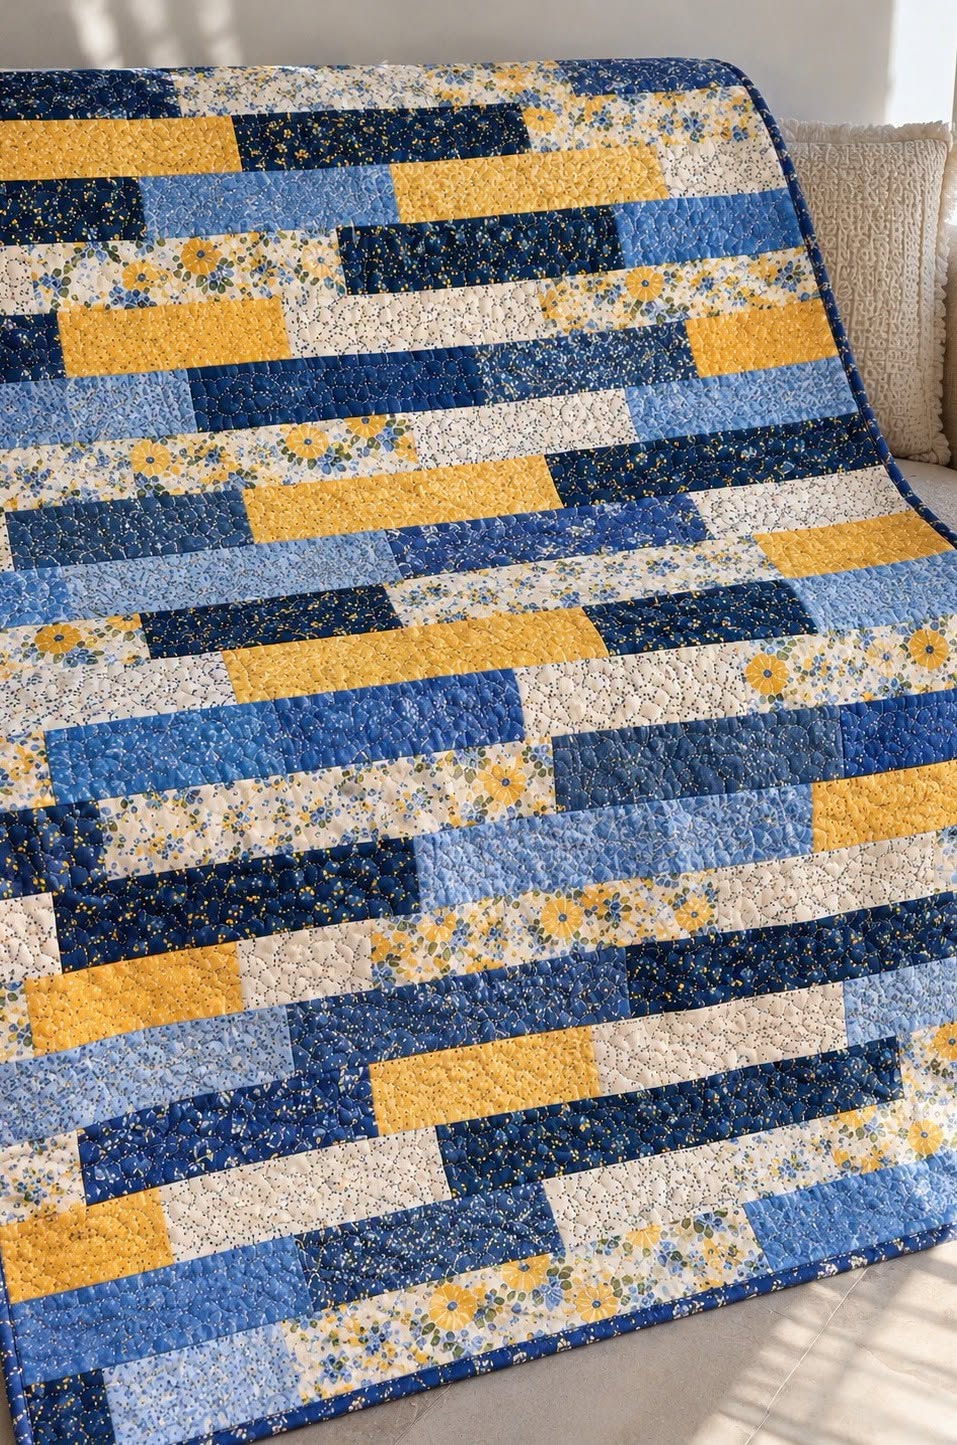
This blue-and-yellow companion follows the numerical row plan in Crafts Patterns’ Vintage Scrappy Brick Quilt. Cream stays cream; rose becomes yellow, burgundy becomes navy, and brown becomes blue. Individual print placement may differ from the photograph.
Cutting quantities and assembly arithmetic have been digitally checked. This adaptation has not been physically sewn and tested.
Fabric & supplies
- Cream / ivory florals: 1 1/2 yd
- Golden yellow prints: 1 yd
- Navy floral prints: 5/8 yd
- Light / medium blue prints: 3/4 yd
- Separate navy binding: 5/8 yd; seven 2 1/4-in WOF strips.
- Backing: 4 1/4 yd; batting: at least 56 x 68 in.
Allowances assume at least 40 in usable fabric width. C = cream; Y = yellow; N = navy; B = light/medium blue. Use several prints within each family.
Cutting inventory
Every rectangle is 3 1/2 in high. Column headings are cut lengths in inches. Entries are quantities. Seam allowances are already included.
| Fabric | 3 1/2 | 6 1/2 | 9 1/2 | 12 1/2 | 15 1/2 | 18 1/2 |
|---|---|---|---|---|---|---|
| C | 1 | 14 | 8 | 11 | 4 | 3 |
| Y | 0 | 4 | 5 | 6 | 3 | 3 |
| N | 0 | 0 | 4 | 2 | 1 | 3 |
| B | 0 | 4 | 3 | 6 | 3 | 1 |
All twenty rows
Read left to right. Each entry gives fabric code and CUT length; do not add seam allowance. Keep adjacent pieces separate even when their family codes match.
| Row | Pieces in sewing order — cut lengths |
|---|---|
| 1 | C 6 1/2 | N 9 1/2 | C 9 1/2 | Y 12 1/2 | C 12 1/2 |
| 2 | C 12 1/2 | Y 18 1/2 | C 18 1/2 |
| 3 | B 9 1/2 | C 12 1/2 | B 18 1/2 | C 9 1/2 |
| 4 | C 6 1/2 | Y 12 1/2 | C 15 1/2 | Y 15 1/2 |
| 5 | C 15 1/2 | N 12 1/2 | B 15 1/2 | C 6 1/2 |
| 6 | N 9 1/2 | C 12 1/2 | Y 9 1/2 | B 12 1/2 | C 6 1/2 |
| 7 | C 3 1/2 | B 12 1/2 | C 6 1/2 | Y 15 1/2 | C 6 1/2 | B 6 1/2 |
| 8 | C 6 1/2 | C 6 1/2 | Y 12 1/2 | N 9 1/2 | C 9 1/2 | Y 6 1/2 |
| 9 | N 18 1/2 | C 18 1/2 | B 6 1/2 | C 6 1/2 |
| 10 | C 9 1/2 | Y 18 1/2 | B 9 1/2 | Y 12 1/2 |
| 11 | B 9 1/2 | C 15 1/2 | Y 6 1/2 | C 12 1/2 | B 6 1/2 |
| 12 | C 6 1/2 | B 12 1/2 | Y 18 1/2 | C 12 1/2 |
| 13 | B 12 1/2 | C 9 1/2 | Y 15 1/2 | N 12 1/2 |
| 14 | C 6 1/2 | N 15 1/2 | Y 9 1/2 | C 12 1/2 | B 6 1/2 |
| 15 | Y 9 1/2 | C 12 1/2 | B 15 1/2 | C 12 1/2 |
| 16 | C 6 1/2 | Y 9 1/2 | N 18 1/2 | C 9 1/2 | Y 6 1/2 |
| 17 | C 12 1/2 | B 12 1/2 | N 9 1/2 | C 15 1/2 |
| 18 | Y 6 1/2 | B 15 1/2 | C 18 1/2 | Y 9 1/2 |
| 19 | C 9 1/2 | Y 12 1/2 | N 18 1/2 | C 9 1/2 |
| 20 | C 6 1/2 | B 12 1/2 | C 12 1/2 | Y 12 1/2 | C 6 1/2 |
Every assembled row measures 48 1/2 × 3 1/2 in before joining. The PDF includes a color-family diagram.
Sew the rows, then the top
1. Test your seam. Sew two scrap rectangles along their short ends with a 1/4-in seam. Their combined length should be the sum of the cut lengths minus 1/2 in. Adjust your seam before using the project pieces.
2. Assemble row 1. Follow page 5, placing successive rectangles right sides together at the short ends. The five cut lengths total 50 1/2 in. Four joins remove 2 in, giving 48 1/2 x 3 1/2 in.
3. Complete rows 2-20. Keep the fabric codes and order visible while sewing. Press short joins open to reduce bulk. Measure each row flat after pressing and cooling. Fix an incorrect cut or seam instead of stretching the row to length.
4. Lay out the whole top. Check the row numbers and their left ends against the map. The changing rectangle lengths create the staggered effect; there is no need to align all short seams vertically.
5. Join in pairs. Sew rows 1-2, 3-4 and so on with 1/4-in seams. Match ends and midpoint; pin at intervals. Join the pairs in their numbered order. Alternate your sewing direction along long seams to help control bowing.
6. Press and check. Support the top and press the long joins open. After ten rows: 48 1/2 x 30 1/2 in. After twenty rows: 48 1/2 x 60 1/2 in. Do not add framing strips.
Height calculation: 20 x 3 1/2 minus 19 x 1/2 = 60 1/2 in unfinished. The outside seam allowances are enclosed by the binding.
Layer, quilt & bind
Backing: Cut two 68-in lengths from 4 1/4 yd. Remove selvages; join the long sides with a 1/2-in seam and press open. Trim the pieced backing to at least 56 x 68 in. This gives about 3 3/4 in extra around the raw top; allow more if your quilter requires it.
Layer: Place backing wrong side up, batting above it and top right side up. Smooth without pulling. Baste from the center outward and follow the batting label for maximum quilting spacing.
Quilt: The supplied photo shows curved, looped quilting. Practice that texture on a sandwich of scraps first. Straight-line quilting with a walking foot is another option, but it changes the surface appearance. After quilting, square the top and trim backing and batting flush.
Prepare binding: Join seven 2 1/4-in WOF strips diagonally, trim allowances to 1/4 in and press open. Fold lengthwise, wrong sides together. Confirm at least 235 in usable length before attaching.
Attach: Start on a straight side with an 8-in loose tail. Sew raw edges to the quilt front using a 1/4-in seam. Stop 1/4 in before each corner; fold up at 45 degrees, then down along the next side to make a miter.
Close and finish: Leave about a 10-in gap. Overlap tails by 2 1/4 in, unfold and join at right angles with a diagonal seam. Check for twists and fit before trimming. Finish attaching, fold to the back and hand-stitch over the attachment seam.
Source design credited to Crafts Patterns. Photo: Cozy Pattern Lane.
Explore more free quilting projects →