Chinese Coin quilt: columns of scrappy coins with cream sashing (45 × 56 inches)
🖨️ Prefer to sew from paper? Printable PDF patterns are in our Etsy shop ↗
A jelly-roll friendly Chinese Coin quilt: 96 scrappy rectangles in four columns, cream sashing and a cream border. Finished size 45 × 56 inches.
Complete guide · No signup required
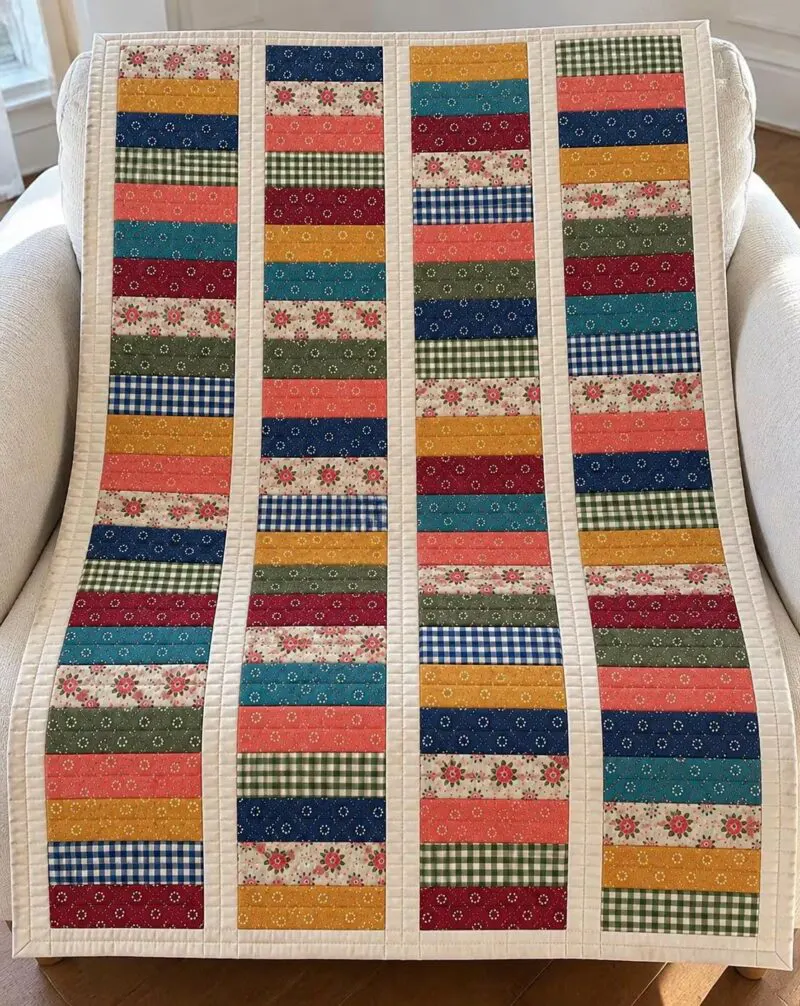
Stacks of coins in happy colors
A Chinese Coin quilt is made of little rectangles stacked into tall columns, like piles of coins. Cream sashing between the columns gives your eyes a place to rest, so even the busiest scraps look calm and tidy.
It is one of the easiest quilts there is. Every rectangle is the same size and every seam is straight. Coral, mustard, navy, teal, green and a few ginghams give it a cheerful vintage look.
Quilt size and what it is made of
All measurements include a ¼-inch seam allowance unless they say finished.
| Part | Size | How many |
|---|---|---|
| Finished quilt | 45 × 56 in | 1 |
| Coins | 2½ × 7½ in (2 × 7 in finished) | 96 |
| Columns | 24 coins each, 7½ × 48½ in | 4 |
| Cream sashing | 3½ × 48½ in | 3 |
| Cream border | 4 in finished | 4 strips |
Fabric and supplies
A jelly roll is perfect here, but any strips 2½ inches wide will do.
- Coins: 20 strips 2½ inches wide (a jelly roll or scraps)
- Cream: 1⅔ yards (sashing, border and binding)
- Backing: 3 yards
- Batting: 53 × 64 inches
Step 1: Cut the coins
Cut each 2½-inch strip into 5 rectangles 2½ × 7½ inches. Twenty strips give 100 coins, so you have 4 spares.
Step 2: Cut the cream
Cut 4 strips 3½ inches wide for the sashing, 5 strips 4½ inches wide for the border and 6 strips 2½ inches wide for the binding. Join the 3½-inch strips end to end and cut 3 pieces 48½ inches long.
Step 3: Sew 4 coin columns
Sew the coins together along their long sides, two by two first, then the pairs into fours, and so on. That keeps the columns straight. Make 4 columns of 24 coins.
Mix the colors so two similar coins never touch. Press the seams in one direction. Each column measures 7½ × 48½ inches.
Step 4: Join the columns and the sashing
Lay out: coin column, sashing, coin column, sashing, coin column, sashing, coin column. Pin each sashing to its column at both ends, in the middle and every few inches, and sew. The center measures 37½ × 48½ inches.
Step 5: Add the cream border
Join the 4½-inch strips end to end. Sew strips to the sides (about 48½ inches), then to the top and bottom (about 45½ inches). The top measures 45½ × 56½ inches.
Step 6: Quilt and bind
Cut the backing into two pieces 53 inches long and sew them together. Layer, baste and quilt: straight lines along the sashing and through the coins look neat and are easy on a home machine.
Join the 6 cream binding strips and bind.
Fixing common problems
Long seams need a little care.
- Columns of different lengths: check all four before adding the sashing.
- Sashing looks wavy: pin it every few inches and do not pull while sewing.
- Coins slant: sew coins in pairs first and press, do not iron.
- A color looks lonely: swap coins between columns before sewing.
Final thoughts
Make it with Christmas prints for a quick holiday throw, or with blues for a gift for a man in the family. Want more cozy projects with every measurement worked out? Our printable PDF patterns are waiting in our Etsy shop, and our free guides are always here.