Four-patch and floral squares quilt with cream sashing: a step-by-step tutorial
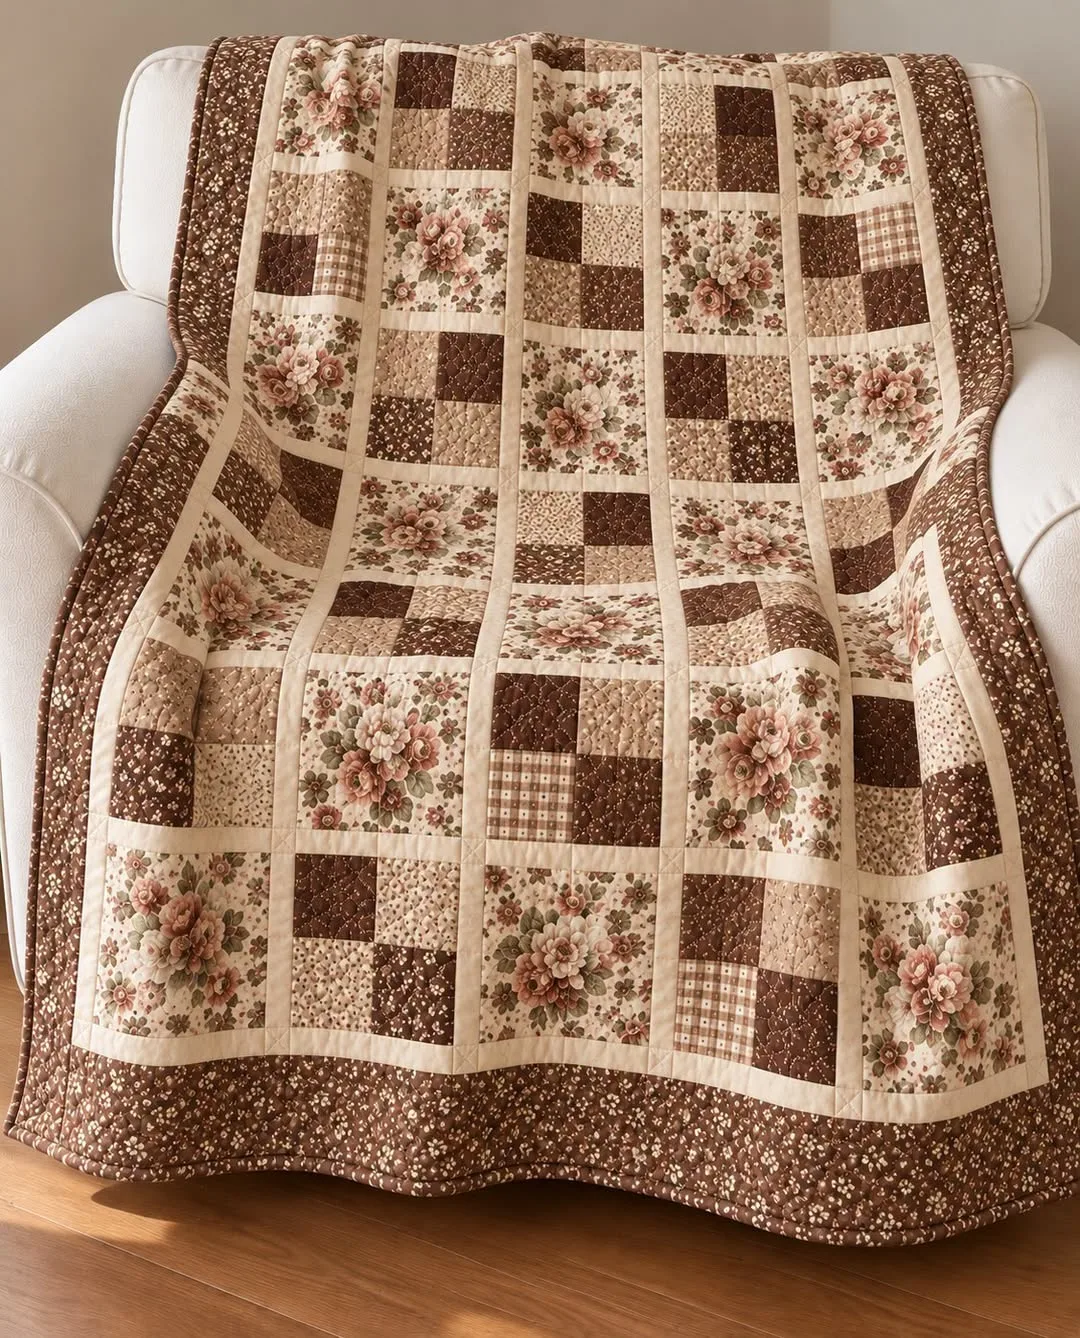
A warm, vintage-style lap quilt: strip-pieced four-patches alternate with big floral squares, framed by cream sashing and a brown border. Full cutting list, yardage, diagrams and gentle tips for every step.
Complete guide · No signup required
Cozy colors and a very simple plan
Chocolate browns, warm tans, soft cream and a pretty rose floral: this quilt feels like a cup of tea in a favorite armchair. Look closely and you will see that it is made of only two kinds of block. Four-patches, made of two dark and two light squares, take turns with large floral squares, like a checkerboard.
Thin cream strips, called sashing, run between all the blocks and give each one a little frame. A wide brown floral border finishes the quilt. There are no triangles at all, so this is a lovely quilt for a beginner, and the large floral squares are a perfect place to show off a fabric you love too much to cut into small pieces.
Words used in this tutorial
Here are the terms you will meet. Come back to this list whenever you need it.
- Four-patch: a block of four squares in two rows of two, here two dark and two light.
- Sashing: narrow strips sewn between blocks, like the frame around a window pane.
- Strip set: two long strips sewn together side by side, then cut into slices called segments.
- WOF (width of fabric): a strip cut from one folded edge of the fabric to the other, about 40 to 42 inches long.
- Seam allowance: always ¼ inch. All cutting sizes in this tutorial include it.
Quilt size and plan
Every block finishes at 6 inches (6½ inches before it is sewn in). The sashing finishes at 1½ inches wide, and the border at 4½ inches. Six rows of five blocks, with sashing between and around them, plus the border, make a quilt of 48 × 55½ inches: a generous lap or armchair size.
| Part | How many | Size before sewing |
|---|---|---|
| Four-patch blocks | 15 | 6½ × 6½ in |
| Floral squares | 15 | 6½ × 6½ in |
| Short sashing strips | 36 | 2 × 6½ in |
| Long sashing strips | 7 | 2 × 39½ in |
| Border | 4 sides | 5 in wide |
| Quilt | 1 | 48 × 55½ in finished |
Fabric and supplies
Amounts assume fabric about 42 inches wide with at least 40 usable inches, and include a little extra.
- Dark brown print: ⅜ yard
- Light tan print: ⅜ yard
- Large floral: 1 yard (extra so you can center the flowers in each square)
- Cream for sashing: 1 yard
- Brown border: 1 yard
- Binding: ½ yard (six 2½-inch strips)
- Backing: 3¾ yards; batting about 56 × 64 inches
- Rotary cutter, mat, long ruler, thread, pins, iron and sewing machine
Step 1: Cut everything
Cutting first and sewing later keeps things calm. Work one fabric at a time and label each stack with a sticky note.
| Fabric | Cut | To get |
|---|---|---|
| Dark | 3 strips 3½ in × WOF | strip sets |
| Light | 3 strips 3½ in × WOF | strip sets |
| Floral | 15 squares 6½ in | floral blocks |
| Cream | 2 strips 6½ in × WOF, cut into 2-in pieces | 36 short sashing strips 2 × 6½ in |
| Cream | 7 strips 2 in × WOF, trimmed to 39½ in | long sashing strips |
| Brown | 6 strips 5 in × WOF | border |
Step 2: Sew the strip sets
Sew each dark strip to a light strip along the long edge with a ¼-inch seam. Press the seam toward the dark fabric. Each strip set measures 6½ inches across.
Trim one end straight, then cut the strip sets into slices 3½ inches wide. You need 30 segments; each strip set gives about eleven.
Step 3: Make fifteen four-patches
Take two segments and turn one of them around, so dark sits next to light. Place them right sides together. Because both seams were pressed toward the dark, they now face opposite directions: push them together until they lock and pin right at the seam.
Sew the long edge. Press the new seam to one side or open. The four-patch should measure 6½ inches square, exactly the size of a floral square. Make fifteen.
- Measure your first four-patch before making the rest.
- If it is smaller than 6½ inches, the seams are a little wide.
- Chain piece: sew all fifteen one after another, then snip them apart.
Step 4: Lay out the blocks
On a bed or the floor, lay out six rows of five blocks, with four-patches and floral squares taking turns like a checkerboard. Start the first row with a four-patch and the second row with a floral square, and continue alternating.
Turn the four-patches so the dark squares run in the same diagonal direction in every block, or turn them freely for a more relaxed look. Take a photo when you are happy.
Step 5: Sew the rows with short sashing
Each row begins and ends with a short sashing strip: sashing, block, sashing, block, sashing, block, sashing, block, sashing, block, sashing. That is five blocks and six short strips.
Press all seams toward the sashing strips. Each row should measure 39½ × 6½ inches. Pin a small paper number to the left end of each row.
Step 6: Join the rows with long sashing
Sew a long sashing strip to the top of row 1. Then sew a long strip to the bottom of each row, and join the rows in order. You use seven long strips: one above every row and one below the last.
Here is a helpful trick to keep the blocks lined up: before sewing a row to a long strip, lay a ruler across and make tiny pencil marks on the long strip where each short sashing strip meets it. Match these marks as you pin. The quilt center should measure 39½ × 47 inches.
Step 7: Add the border
Measure the quilt center through the middle from top to bottom (about 47 inches). Join the brown border strips end to end and cut two pieces of that length. Sew them to the left and right sides and press toward the border.
Now measure across the middle, including the side borders (about 48½ inches), cut two more pieces and sew them to the top and bottom. Measuring through the middle, instead of along the edges, keeps the quilt flat and square.
Step 8: Quilt and bind
Layer the backing, batting and top, and baste. A soft all-over meander suits the vintage look; crossed lines through the sashing intersections, like little X's, are a pretty touch.
For the binding you need about 219 inches: the 207-inch edge plus 12 inches for joins and corners. Six 2½-inch strips are enough.
Fixing common problems
These are the usual surprises with sashed quilts, and how to fix them.
- Blocks do not line up across the sashing: mark the long strips before pinning, as in step 6.
- Rows different lengths: a sashing seam was wider than ¼ inch. Measure each block and strip.
- Four-patch centers do not meet: the segment seams were not nested. Re-press one segment the other way.
- Wavy border: the border was cut to the edge length. Always measure through the middle.
Final thoughts
This quilt shows how much charm simple squares can have when colors are chosen with love. Cut carefully, nest your seams, mark your sashing and measure through the middle, and you will have a quilt that looks like it has always belonged in your home. Follow Cozy Pattern Lane on Facebook and Instagram (@cozypatternlane) for more easy quilting ideas.