Hopscotch bricks quilt: five columns of zigzag rectangles on cream (46 × 56 inches)
🖨️ Prefer to sew from paper? Printable PDF patterns are in our Etsy shop ↗
Little print rectangles zigzag down five cream columns like a game of hopscotch. Two mirror-image units, jelly-roll friendly, finished at 46 × 56 inches.
Complete guide · No signup required
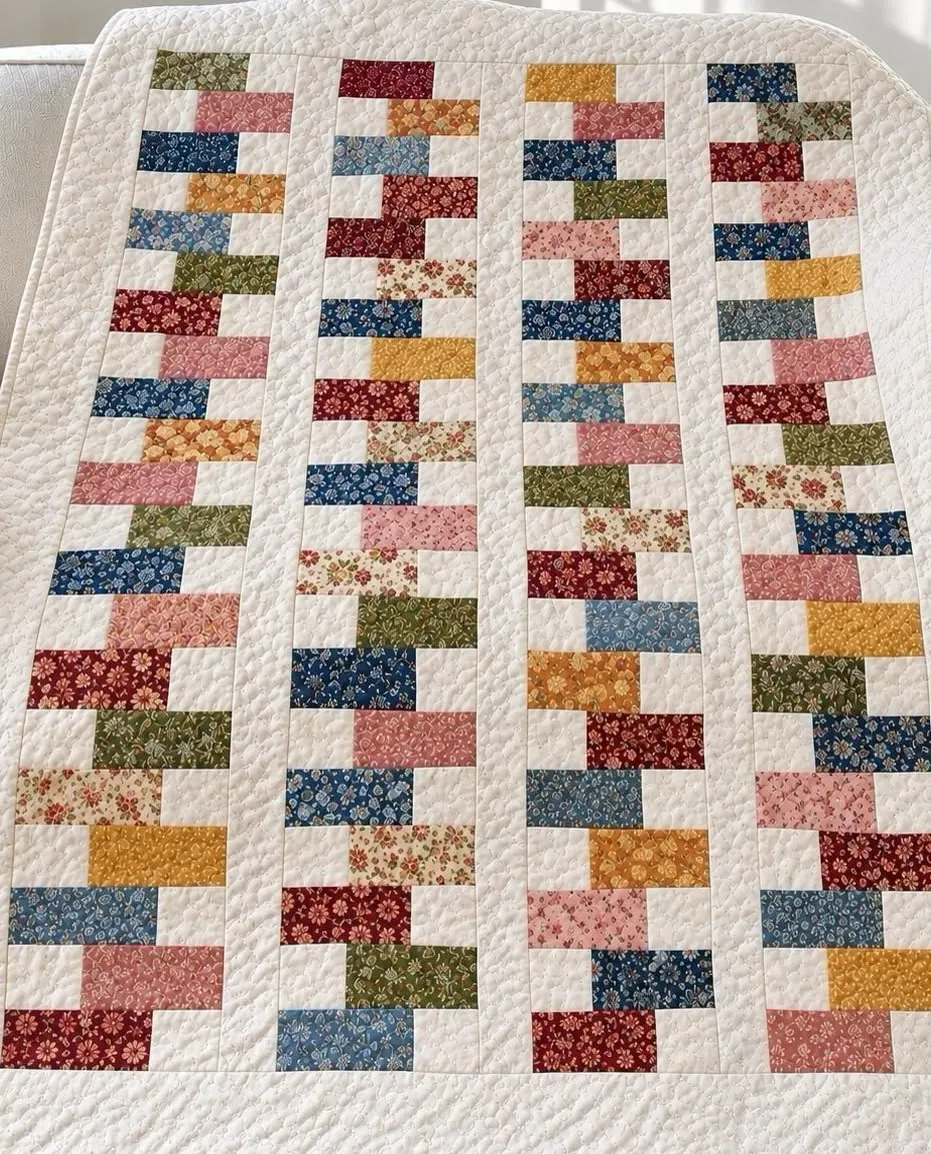
Bricks that hop from side to side
Look down each column of this quilt and the print rectangles hop from left to right and back again, like a child playing hopscotch. Creamy space all around keeps it fresh, and the blues, reds, mustards, greens and pinks look like a happy box of scraps.
Each row is just one rectangle and one little cream square. You make two versions, one the mirror of the other, and stack them in turns.
Quilt size and what it is made of
All measurements include a ¼-inch seam allowance unless they say finished.
| Part | Size | How many |
|---|---|---|
| Finished quilt | 46 × 56 in | 1 |
| Print rectangles | 2½ × 4½ in | 120 |
| Cream squares | 2½ in | 120 |
| Columns | 24 units each, 6½ × 48½ in | 5 |
| Cream sashing | 2 in finished | 4 strips |
| Cream border | 4 in finished | 4 strips |
Fabric and supplies
A jelly roll or a stack of 2½-inch strips is perfect for the rectangles.
- Prints: 14 strips 2½ inches wide (9 rectangles per strip)
- Cream: 1⅔ yards
- Binding: ½ yard
- Backing: 3 yards
- Batting: 54 × 64 inches
Step 1: Cut the pieces
From each print strip, cut 9 rectangles 2½ × 4½ inches. From the cream, cut 8 strips 2½ inches wide and cut them into 120 squares 2½ inches. Cut 5 more cream strips 2½ inches wide for the sashing and 5 strips 4½ inches wide for the border.
Step 2: Make 60 of unit A and 60 of unit B
Unit A: sew a cream square to the right end of a print rectangle. Unit B: sew a cream square to the left end. Press toward the print. Each unit measures 2½ × 6½ inches.
Step 3: Sew 5 columns
Stack the units in a column: A, B, A, B … until you have 24 units. Sew them together along their long edges, pinning at the seams. Make 5 columns, each 6½ × 48½ inches.
Step 4: Add the sashing
Join the 2½-inch cream sashing strips end to end and cut 4 pieces 48½ inches long. Sew the columns and sashing together: column, sashing, column, sashing, column, sashing, column, sashing, column. Pin every few inches. The center measures 38½ × 48½ inches.
Step 5: Add the cream border
Join the 4½-inch strips. Sew them to the sides (48½ inches), then to the top and bottom (46½ inches). The top measures 46½ × 56½ inches.
Step 6: Quilt and bind
Cut the backing into two pieces 54 inches long and sew them together. Layer, baste and quilt: an all-over meander, like in the photo, or straight lines down each column.
Join 6 binding strips 2½ inches wide and bind.
Fixing common problems
A few checks keep the columns tidy.
- Columns of different lengths: check each one is 48½ inches before adding sashing.
- The zigzag breaks: one unit is the wrong version. Lay the column out before sewing.
- Wavy sashing: pin it every few inches and do not stretch it.
- Prints too pale: keep the lightest prints away from each other.
Final thoughts
In reds and greens it is a fast Christmas throw; in pastels, a sweet baby quilt. Want more cozy projects with every measurement worked out? Our printable PDF patterns are waiting in our Etsy shop, and our free guides are always here.