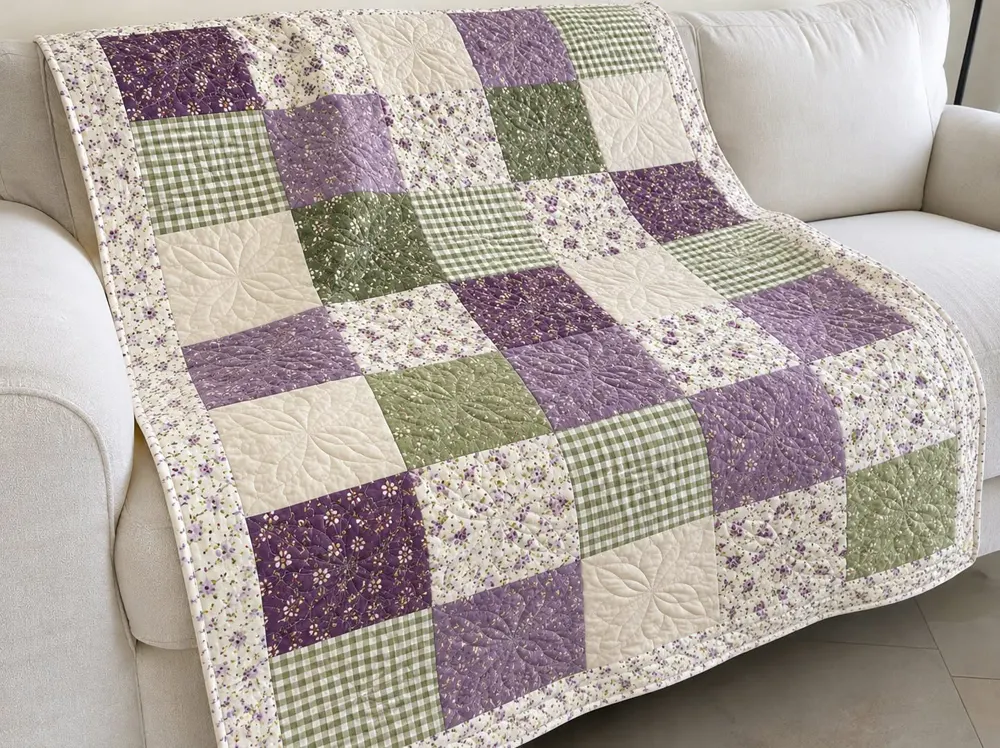
Lavender and sage patchwork quilt: big 6-inch squares and a floral border (44 × 56 inches)
🖨️ Prefer to sew from paper? Printable PDF patterns are in our Etsy shop ↗
The easiest quilt there is: 48 big squares in lavender, sage, gingham and cream, with a floral border. Perfect for a first quilt, finished at 44 × 56 inches.
Complete guide · No signup required
A first quilt you will actually use
If you have never made a quilt, start here. It is only squares, sewn in rows, with a border around them. The magic is all in the colors: deep purple, soft lilac, sage, green gingham and cream make it look like a spring garden.
Big 6-inch squares go together fast and show off pretty fabrics, so you can finish the top in a weekend.
Quilt size and what it is made of
All measurements include a ¼-inch seam allowance unless they say finished.
| Part | Size | How many |
|---|---|---|
| Quilt | 44 × 56 in finished | 1 |
| Squares | 6½ in (6 in finished) | 48 |
| Layout | 6 across × 8 down | 36 × 48 in center |
| Floral border | 4 in finished | 4 strips |
Fabric and supplies
Six fabrics, eight squares of each.
- Six fabrics (dark purple floral, lilac, sage, green gingham, cream and a lilac floral): ⅜ yard each
- Lilac floral border: ⅔ yard
- Binding: ½ yard
- Backing: 3 yards
- Batting: 52 × 64 inches
Step 1: Cut the squares
From each of the six fabrics, cut 2 strips 6½ inches wide and cut 8 squares 6½ inches. You will have 48 squares.
Step 2: Lay out the squares
Lay out 6 squares across and 8 down. A simple trick keeps the colors balanced: put the fabrics in the same order in every row, but start each row two fabrics later than the row above. No two matching squares will touch.
Step 3: Sew the rows
Sew the squares in each row together. Press the seams of odd rows to the right and even rows to the left, so the seams lock together when you join the rows.
Join the rows, pinning at every seam. The center measures 36½ × 48½ inches.
Step 4: Add the floral border
Cut 5 strips 4½ inches wide and join them end to end. Measure the length through the middle (about 48½ inches), cut 2 strips and sew them to the sides. Then measure the width (about 44½ inches), cut 2 strips and sew them to the top and bottom. The top measures 44½ × 56½ inches.
Step 5: Quilt and bind
Cut the backing into two 52-inch pieces and sew them together. Layer, baste and quilt: a simple flower or loop in each square, like in the photo, is lovely, and straight lines along the seams are even easier.
Cut 6 binding strips 2½ inches wide, join them and bind.
Fixing common problems
Squares are forgiving, but these help.
- Corners do not meet: press rows in opposite directions and pin at every seam.
- Rows of different lengths: your seam allowance changes. Use a ¼-inch foot or a strip of tape as a guide.
- The border ripples: measure through the middle, never along the edge.
- Gingham looks crooked: cut with the checks, not with the fabric edge.
Final thoughts
Choose any six fabrics you love and this quilt will look like you. Want more cozy projects with every measurement worked out? Our printable PDF patterns are waiting in our Etsy shop, and our free guides are always here.