Pine tree forest quilt: a step-by-step tree block tutorial
Make tall, sharp-tipped tree blocks without templates: one square for the tree, a mirror pair of background pieces, a trunk strip and an easy trim. Includes a 40 × 50-inch lap quilt plan.
Complete guide · No signup required
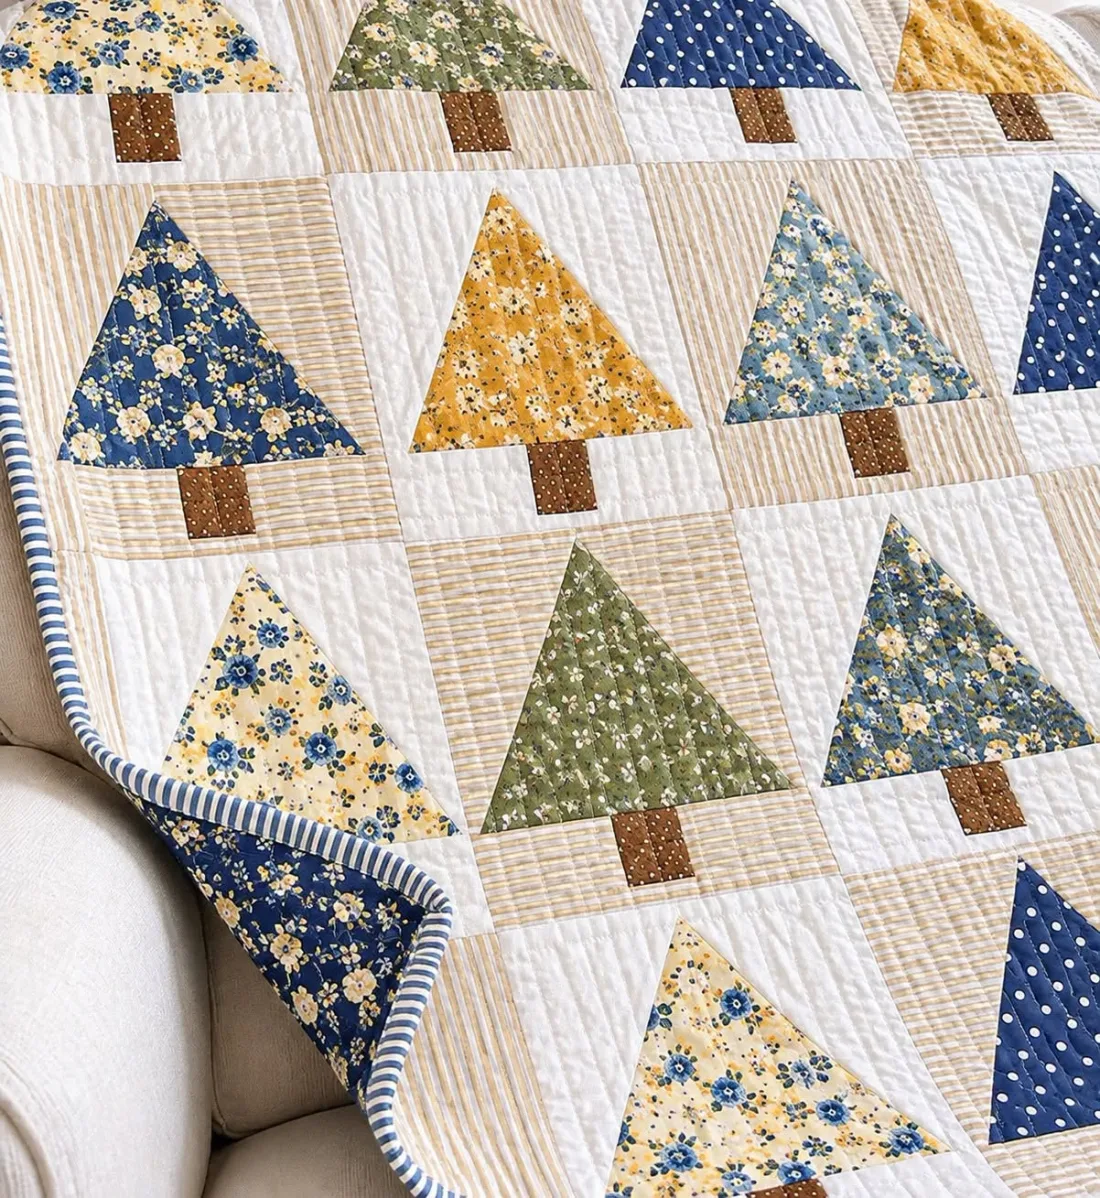
A cozy forest you can sew in a weekend
Rows of tall, simple trees are one of the most calming quilts you can make. Each block is just a tree, a trunk and a background, so it is a lovely way to use favorite florals, dots and small prints. Alternate a plain cream background with a soft stripe, as in the quilt above, and the forest looks planned even when every tree is a different fabric.
This tutorial uses no templates and no special rulers. The tree is cut from a square, the background sides come from two rectangles cut in one go, and everything is made a little oversized and trimmed. That trim is what gives every tree a sharp tip and straight sides.
Block and quilt sizes
Each tree block finishes at 8 × 10 inches. Before it is sewn into the quilt it measures 8½ × 10½ inches. Twenty-five blocks, five across and five down, make a 40 × 50-inch lap quilt.
| Unit | Measures before joining | Finished in the quilt |
|---|---|---|
| Tree unit | 8½ × 8½ in | 8 × 8 in |
| Trunk strip | 8½ × 2½ in | 8 × 2 in |
| Tree block | 8½ × 10½ in | 8 × 10 in |
| Quilt (5 × 5 blocks) | 40½ × 50½ in | 40 × 50 in |
Fabric for the 40 × 50-inch quilt
Amounts assume fabric at least 42 inches wide with about 40 usable inches, and they include a little extra. Check your own fabric width before cutting.
- Trees: 13 fat quarters or scraps that fit a 9½-inch square (each fat quarter gives two trees)
- Background 1 (cream): 2 yards, for 13 blocks
- Background 2 (stripe or second neutral): 1¾ yards, for 12 blocks
- Trunks: ¼ yard brown
- Binding: ½ yard (five 2½-inch strips)
- Backing: 3¼ yards, and batting about 48 × 58 inches
Step 1: Cut the pieces for one block
Cut these pieces for every block. For the whole quilt, multiply by 25 and divide the background pieces between your two backgrounds.
| Piece | Fabric | Cut |
|---|---|---|
| Tree | 1 square, 9½ × 9½ in | |
| Tree sides | Background | 2 rectangles, 6½ × 11 in |
| Trunk | Brown | 1 square, 2½ × 2½ in |
| Trunk sides | Background | 2 pieces, 3½ × 2½ in (3½ wide, 2½ tall) |
Step 2: Cut the tree triangle
On the tree square, make a small mark at the center of the top edge, 4¾ inches from either side. Line up your ruler from that mark to one bottom corner and cut. Repeat to the other bottom corner.
You now have one tall triangle with a 9½-inch base and a 9½-inch height. It is deliberately bigger than the finished tree; the extra fabric is trimmed away in step 5.
Step 3: Cut a mirror pair of side pieces
Long triangles cut from rectangles only lean one way, so the left and right sides must be cut as a mirror pair. The easy way is to cut them together.
Stack the two background rectangles wrong sides together, edges even. Cut once from one corner to the opposite corner. You get four triangles: two for this block, and each pair is a left and a right. If your background is a stripe, cut with the stripes running the same direction in both rectangles.
Step 4: Sew the sides to the tree
Place one side triangle on the tree, right sides together, with their long slanted edges even. The square corner of the background goes toward the top, and the background's tip should stick out about 1 inch past the tree's tip. Pin and sew ¼ inch from the slanted edge.
- Press the seam toward the background, lifting the iron instead of sliding it: these edges are on the bias and stretch easily.
- Sew the second side triangle to the other slanted edge the same way, again with its tip about 1 inch past the tree tip.
- Press, and let the unit cool flat before measuring.
Step 5: Trim the tree unit to 8½ inches
This trim decides how the tree looks, so take your time. A square ruler of 9½ inches or larger is easiest; you can also use a long ruler and trim one side at a time.
- Find the ruler's center line (4¼ inches on an 8½-inch square) and lay it straight through the tree tip and the middle of the base.
- Slide the ruler until the tree tip sits ¼ inch below the ruler's top edge. That ¼ inch is the seam allowance that keeps the tip sharp.
- Check the bottom: each tree edge should cross the ruler's ¼-inch line ¼ inch in from the corner. Trim the top and the two sides.
- Turn the unit and trim the bottom so the unit measures 8½ × 8½ inches.
Step 6: Make the trunk strip
Sew a 3½ × 2½-inch background piece to each side of the brown trunk square, along the 2½-inch edges. Press toward the trunk. The strip measures 8½ × 2½ inches, the same width as the tree unit.
Step 7: Join the tree and the trunk
Fold the tree unit and the trunk strip in half to finger-press their centers. Match the centers, pin and sew the trunk strip to the bottom edge of the tree. Press toward the trunk strip.
Measure the block: 8½ × 10½ inches. Make 25 blocks, 13 on the first background and 12 on the second.
Step 8: Lay out and sew the quilt
Lay the blocks out five across and five down, alternating the two backgrounds like a checkerboard. Move the trees around until no two of the same print touch, and take a photo of the layout.
Sew the blocks into five rows, pressing the seams of each row in the opposite direction from the row above. Join the rows, nesting the seams. The quilt top measures 40½ × 50½ inches.
Step 9: Quilt and bind
Layer the backing, batting and top, and quilt as you like. Straight vertical lines about ½ inch apart, like the quilt in the photo, suit the tall trees and are easy on a home machine with a walking foot.
For the binding you need about 192 inches: the 180-inch perimeter plus 12 inches for joining and corners. Five 2½-inch strips across the width of the fabric are enough. A narrow blue stripe makes a cheerful frame.
Fixing common problems
Tree blocks show errors at the tip and at the bottom corners, so check those first.
- Not enough background at a top corner: the side piece was placed too low. Next time let its tip stick out about 1 inch past the tree tip.
- Tip cut off in the quilt: the tip was trimmed closer than ¼ inch to the edge. Keep it exactly ¼ inch below the top when trimming.
- Trees leaning: the ruler's center line was not through the tip and the middle of the base. Check both points before cutting.
- Wavy sides: the bias edges stretched while pressing. Press gently and starch the background lightly before cutting.
Final thoughts
This forest is all about calm, repeated shapes, so the secret is consistency: cut every piece the same, sew a steady ¼ inch and trim each tree the same way. Make one block first and measure it before cutting all 25. Then enjoy choosing a different print for every tree. Follow Cozy Pattern Lane on Facebook and Instagram (@cozypatternlane) for more quilting tips.