Postage stamp table topper: 100 little squares from one strip set (24 × 24 inches)
🖨️ Prefer to sew from paper? Printable PDF patterns are in our Etsy shop ↗
A warm checkerboard of 100 tiny squares in golds and browns, made the quick way with one strip set and a brown border. Finished size 24 × 24 inches.
Complete guide · No signup required
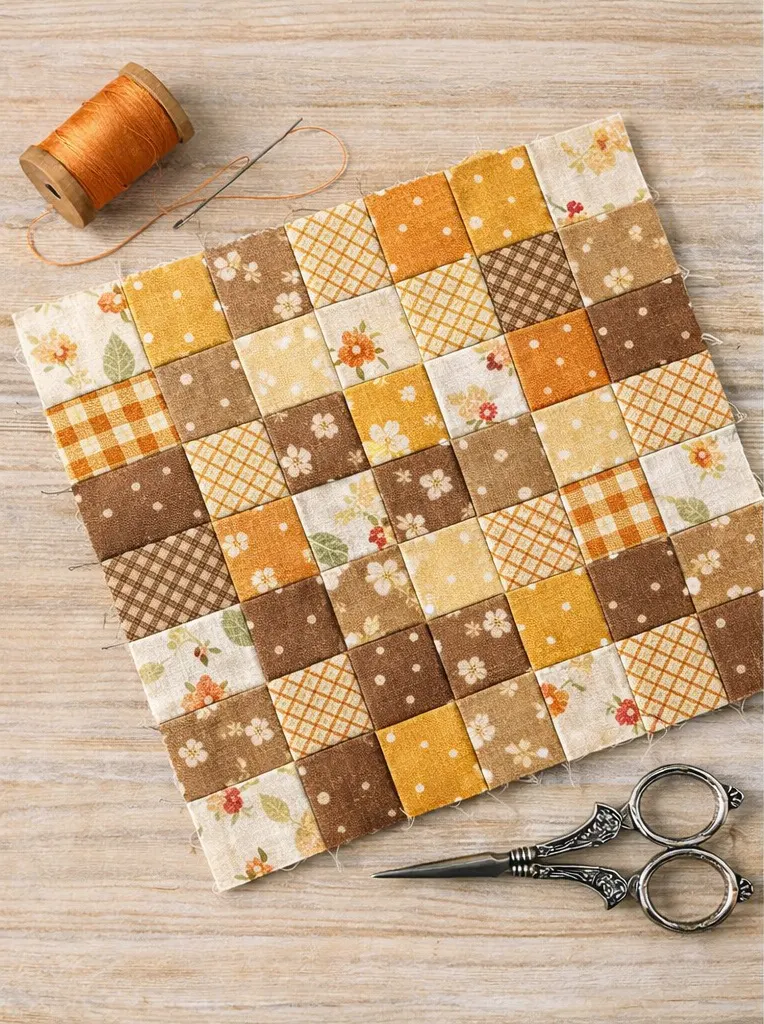
A hundred squares, the easy way
Postage stamp quilts are made of many tiny squares, like a sheet of stamps. Sewing them one by one would take forever, so we use a trick: sew long strips together, slice them and turn every other slice around.
In golds, creams and browns this topper looks like a cozy autumn table. It is a lovely weekend project and a great way to learn strip piecing.
Topper size and what it is made of
All measurements include a ¼-inch seam allowance unless they say finished.
| Part | Size | How many |
|---|---|---|
| Finished topper | 24 × 24 in | 1 |
| Little squares | 2 in finished | 100 |
| Strip set | 10 strips 2½ in wide | 1 |
| Brown border | 2 in finished | 4 strips |
Fabric and supplies
Choose five light prints (creams and golds) and five dark prints (browns), clearly different from each other.
- 5 light strips and 5 dark strips, 2½ inches × the width of the fabric (jelly roll strips work)
- Brown border and binding: ½ yard
- Backing: 1 yard
- Batting: 30 × 30 inches
Step 1: Sew the strip set
Trim each of the 10 strips to 27 inches long. Sew them together along their long edges, light and dark taking turns: light, dark, light, dark … ending with dark.
Sew each new strip in the opposite direction from the last one, so the set stays straight. Press all seams toward the dark strips. The set measures 20½ inches wide.
Step 2: Cut ten slices
Straighten one end, then cut 10 slices 2½ inches wide across the strips. Each slice is a column of 10 little squares.
Step 3: Sew the slices together
Lay the slices side by side. Turn every other slice upside down, so a dark square sits next to every light square. Sew them together, pinning at every seam; the seams lock because they were pressed toward the dark.
The center measures 20½ × 20½ inches.
Step 4: Add the brown border
Cut 3 brown strips 2½ inches wide. Sew 2½ × 20½-inch strips to two sides, then 2½ × 24½-inch strips to the other two. The topper measures 24½ inches.
Step 5: Quilt and bind
Layer, baste and quilt: straight diagonal lines through the squares, like in the photo, are quick and pretty.
Cut 3 brown binding strips 2½ inches wide, join them and bind.
Fixing common problems
Strip piecing is fast, and these tips keep it neat.
- Squares do not line up: press all seams toward the dark so they lock, and pin at every seam.
- The strip set curves: sew each strip in the opposite direction from the last.
- Slices of different widths: square up the end of the set again after every few cuts.
- The checkerboard looks muddy: make sure every light print is clearly lighter than every dark print.
Final thoughts
Make two more strip sets and you have enough for a baby quilt. Want more cozy projects with every measurement worked out? Our printable PDF patterns are waiting in our Etsy shop, and our free guides are always here.