Scrappy sashed squares quilt: charm squares, cream sashing and tiny cornerstones (48 × 59 inches)
🖨️ Prefer to sew from paper? Printable PDF patterns are in our Etsy shop ↗
Sixty-three scrappy squares framed by cream sashing and little scrappy cornerstones, with a blue border. Charm-pack friendly and finished at 48 × 59 inches.
Complete guide · No signup required
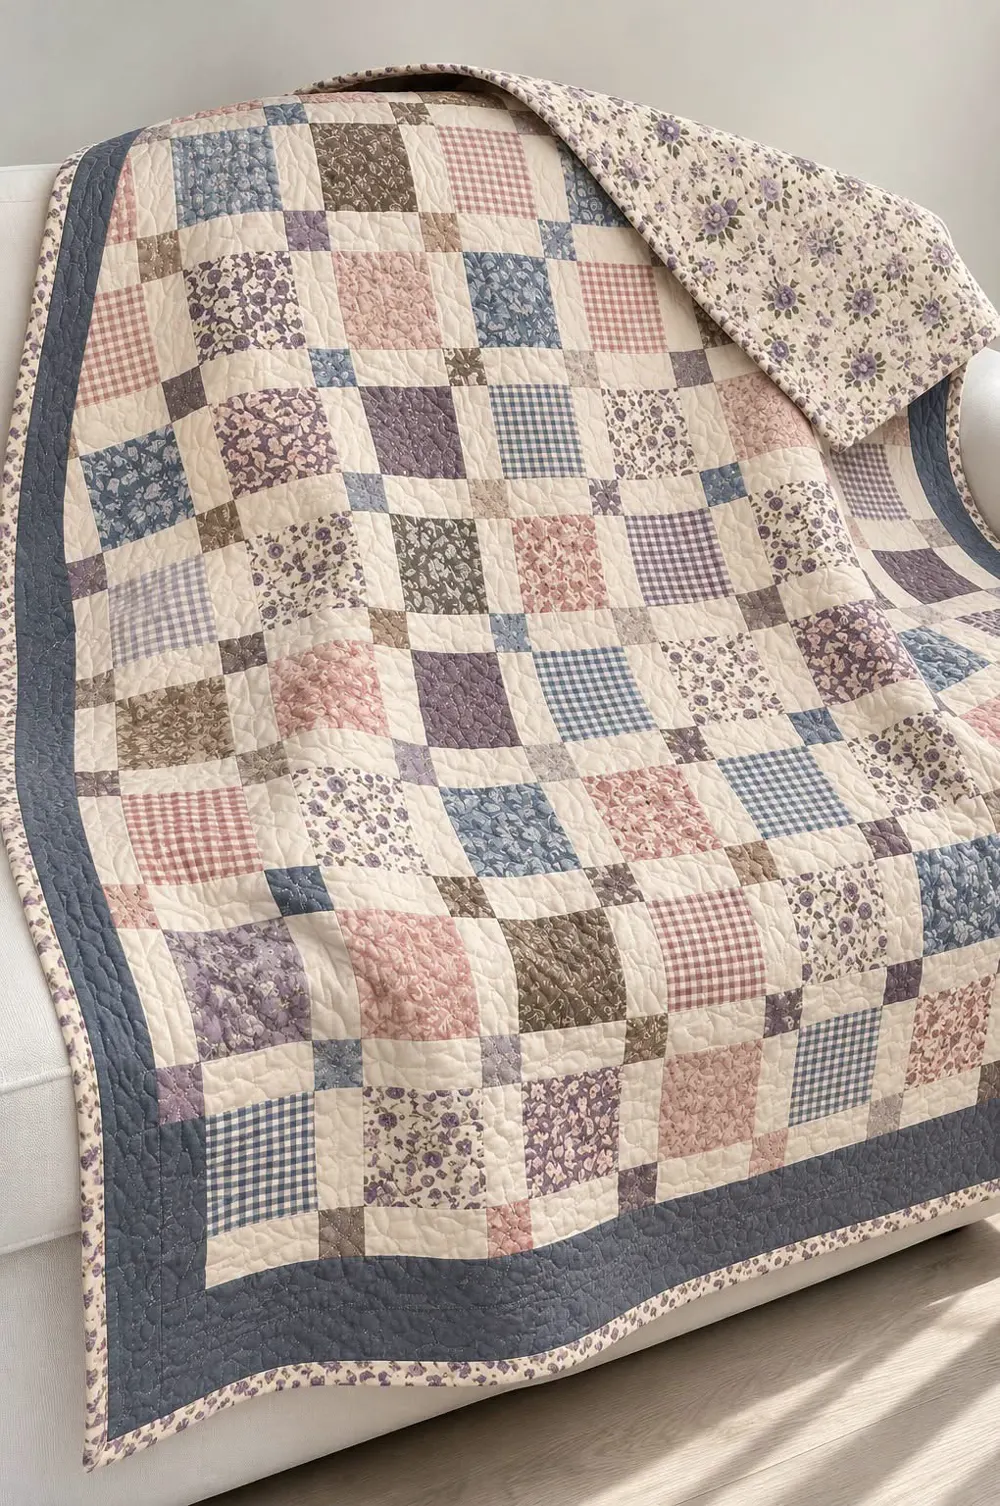
Every square gets its own frame
Simple squares look extra special when each one sits in its own little cream frame. Tiny scrappy squares at the corners, called cornerstones, add sparkle, and a blue border finishes it like a picture frame.
It is a charm-pack quilt: two packs of 5-inch squares give you the big squares and the cornerstones.
Quilt size and what it is made of
All measurements include a ¼-inch seam allowance unless they say finished.
| Part | Size | How many |
|---|---|---|
| Quilt | 48 × 59 in finished | 1 |
| Squares | 4½ in (4 in finished) | 63 |
| Sashing | 2 × 4½ in | 142 |
| Cornerstones | 2 in | 80 |
| Blue border | 4 in finished | 4 strips |
Fabric and supplies
Soft pinks, lilacs, blues, browns and ginghams give the vintage look.
- Two charm packs (84 squares 5 inches) or scraps
- Cream: 1¼ yards
- Blue border: ¾ yard
- Floral binding: ½ yard
- Backing: 3¼ yards
- Batting: 56 × 67 inches
Step 1: Cut everything
Trim 63 charm squares to 4½ inches. Cut each of the other 21 charm squares into four 2-inch squares: 84 cornerstones (you need 80).
Cream: cut 8 strips 4½ inches wide and cut them into 142 pieces 2 × 4½ inches (20 per strip).
| Fabric | Cut | How many |
|---|---|---|
| Charm squares | 4½ in squares | 63 |
| Charm squares | 2 in squares | 80 |
| Cream | 2 × 4½ in | 142 |
| Blue | 4½ in strips | 6 |
| Binding | 2½ in strips | 6 |
Step 2: Sew 9 square rows
Each square row is: sash, square, sash, square … with 7 squares and 8 sashes, starting and ending with a sash. Press the seams toward the sashes.
Step 3: Sew 10 sashing rows
Each sashing row is: cornerstone, sash, cornerstone, sash … with 8 cornerstones and 7 sashes, starting and ending with a cornerstone. Press the seams toward the sashes, so they lock with the square rows.
Step 4: Join the rows
Start with a sashing row, then a square row, and keep alternating, ending with a sashing row. Pin at every cornerstone. The center measures 40½ × 51½ inches.
Step 5: Add the blue border
Join the 6 blue strips end to end. Sew 4½ × 51½-inch strips to the sides, then 4½ × 48½-inch strips to the top and bottom (always measure through the middle first). The top measures 48½ × 59½ inches.
Step 6: Quilt and bind
Cut the backing into two 56-inch pieces and sew them together. Layer, baste and quilt with an all-over meander. Join the 6 binding strips and bind.
Fixing common problems
Sashing shows every wobble, so these help.
- Cornerstones do not line up: pin at every cornerstone seam before joining rows.
- Rows of different lengths: check every row before joining; square rows and sashing rows should both measure 40½ inches.
- Sashing looks wavy: press, do not iron, and starch the cream before cutting.
- Squares smaller than 4½ inches: trim all the charms with the same ruler line.
Final thoughts
Any charm pack you love becomes a quilt with this layout. Want more cozy projects with every measurement worked out? Our printable PDF patterns are waiting in our Etsy shop, and our free guides are always here.