Scrappy strips and diamonds quilt: a jelly-roll friendly 46 × 60-inch throw
🖨️ Prefer to sew from paper? Printable PDF patterns are in our Etsy shop ↗
Five columns of scrappy rectangles and four columns of little diamonds. Simple cutting, one easy unit and a big scrappy throw at 46 × 60 inches.
Complete guide · No signup required
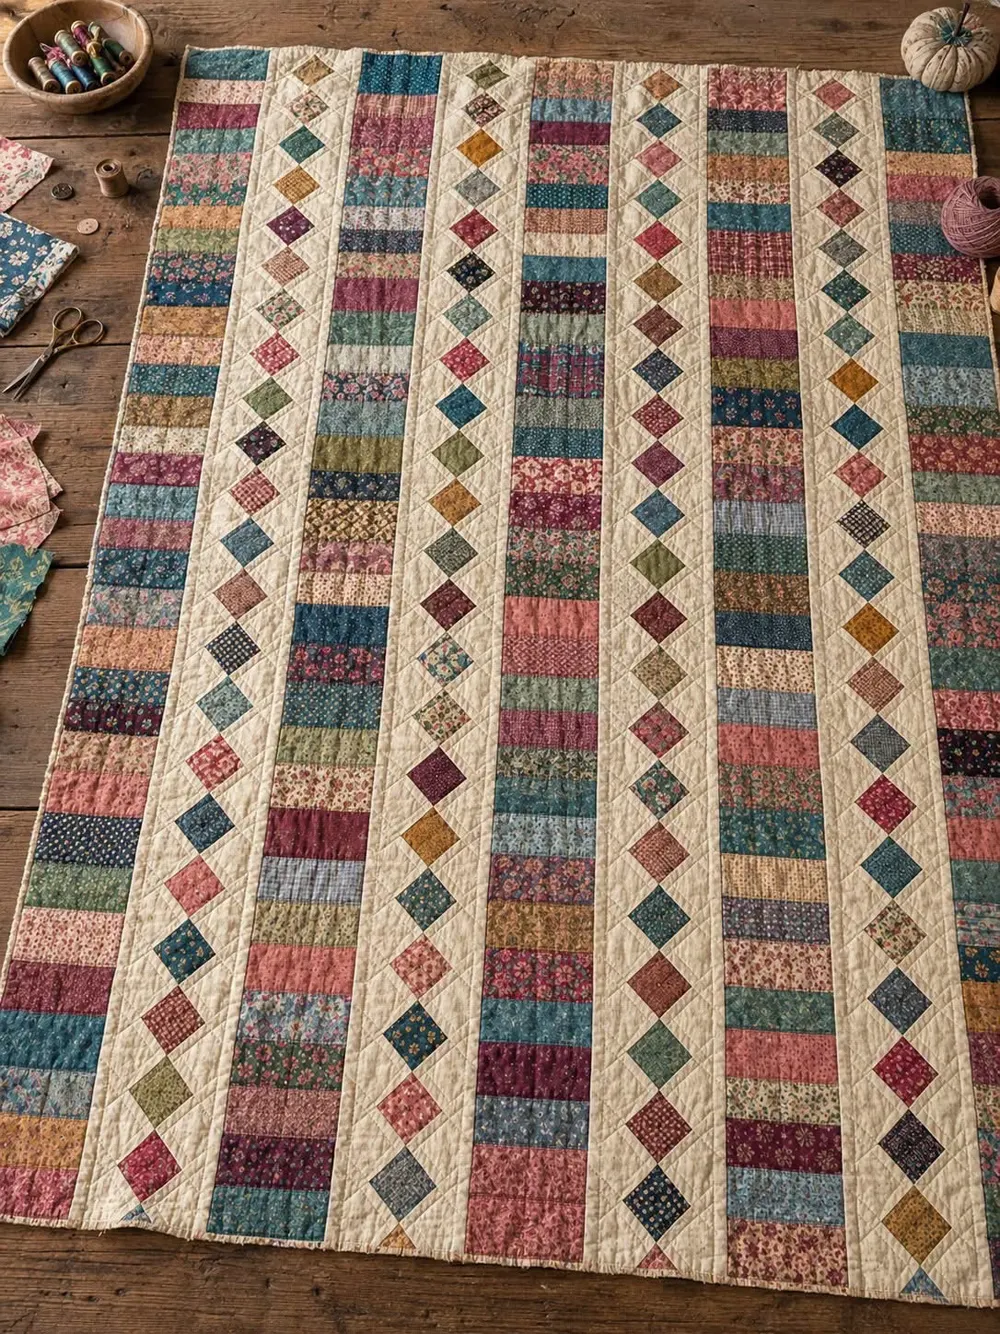
A scrap quilt with a gentle rhythm
This quilt is built in columns. Five wide columns are just rectangles stacked on top of each other, and between them run four narrow cream columns filled with little scrappy diamonds.
It looks busy and old-fashioned in the best way, yet you only ever sew two things: rectangles in a line and a square in a square. A jelly roll and a couple of charm packs will do almost all the work.
Quilt size and what it is made of
All measurements include a ¼-inch seam allowance unless they say finished.
| Part | Finished size | How many |
|---|---|---|
| Quilt | 46 × 60 in | 1 |
| Strip columns | 6 × 60 in | 5 |
| Rectangles | 2 × 6 in | 150 |
| Diamond columns | 4 × 60 in | 4 |
| Square-in-a-square units | 4 × 4 in | 60 |
Fabric and supplies
Pick prints in rose, teal, mustard, plum and green for the warm vintage look, and a soft cream for the background.
- Rectangles: 25 strips 2½ inches wide (from a jelly roll or your scraps)
- Diamond centers: 60 squares 3⅜ inches (one 5-inch charm square gives one)
- Cream: 1 yard
- Binding: ½ yard
- Backing: 3 yards
- Batting: 54 × 68 inches
Step 1: Cut the rectangles
Cut each 2½-inch strip into 6 rectangles 2½ × 6½ inches. Twenty-five strips give the 150 rectangles you need.
Step 2: Cut the diamonds and the cream triangles
Cut 60 print squares 3⅜ inches. From the cream, cut 9 strips 2⅞ inches wide and cut them into 120 squares 2⅞ inches (14 per strip). Cut every cream square once from corner to corner: you get 240 triangles.
Step 3: Make 60 square-in-a-square units
Fold a print square and a cream triangle in half to crease their centers. Match the creases and sew a triangle to two opposite sides of the square. Press toward the triangles.
Sew triangles to the other two sides and press. Trim the unit to 4½ inches, keeping ¼ inch of fabric beyond each point of the diamond.
Step 4: Sew the strip columns
Sew rectangles together along their long sides, two by two, then the pairs into fours, and so on. That keeps the column straight. Make 5 columns of 30 rectangles, mixing the colors.
Press the seams in one direction. Each column should measure 6½ × 60½ inches.
Step 5: Sew the diamond columns
Sew 15 square-in-a-square units into a line, with the diamond points touching. Make 4 columns, each 4½ × 60½ inches.
Step 6: Join the columns
Lay out the quilt starting and ending with a strip column: strips, diamonds, strips, diamonds, strips, diamonds, strips, diamonds, strips.
Pin each pair of columns at both ends and in the middle, then every few inches, and sew. Press toward the strip columns. The top measures 46½ × 60½ inches.
Step 7: Quilt and bind
Cut the backing into two 54-inch pieces and sew them together along a long edge. Layer, baste and quilt: a diagonal crosshatch, like in the photo, follows the diamonds nicely.
Cut 6 binding strips 2½ inches wide, join them and bind the quilt.
Fixing common problems
Long columns need a little care.
- Columns of different lengths: check every column against 60½ inches before joining, and ease in small differences with pins.
- Diamond points cut off: trim the units with the ruler's ¼-inch line on the diamond tips.
- Wavy columns: sew rectangles in pairs and fours first instead of adding one at a time.
- Units smaller than 4½ inches: your seam is too wide. Test on a scrap.
Final thoughts
This is a wonderful quilt for using what you already have: every rectangle can be different. Want more cozy projects with every measurement worked out? Our printable PDF patterns are waiting in our Etsy shop, and our free guides are always here.