On-point squares quilt: vintage blue, green and brown diamonds with a floral border (about 50½ × 59 inches)
🖨️ Prefer to sew from paper? Printable PDF patterns are in our Etsy shop ↗
Simple squares turned on point make a soft diamond quilt in blues, greens and browns, finished with a blue floral border. About 50½ × 59 inches.
Complete guide · No signup required
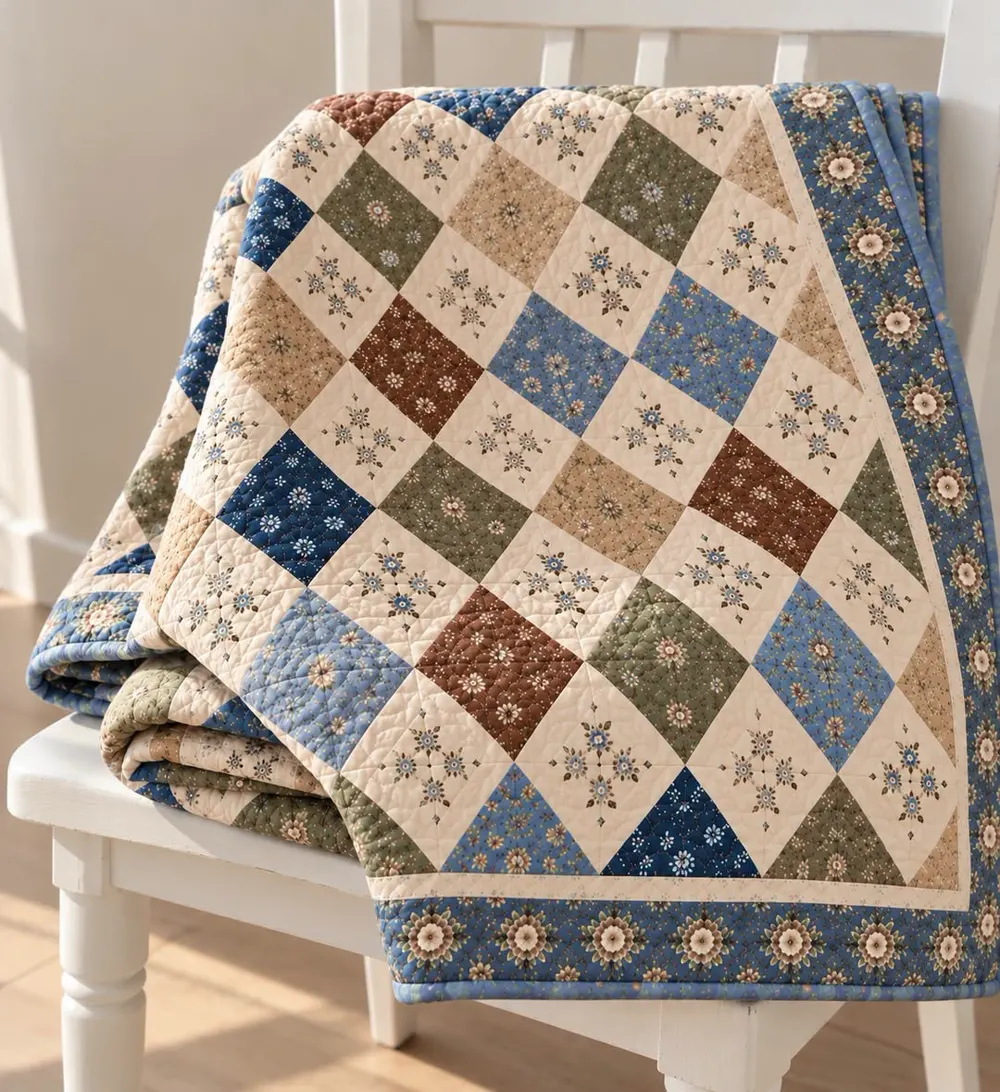
Plain squares that look like diamonds
Turn a checkerboard on its corner and every square becomes a diamond. That is all this quilt is: print squares and cream squares set on point, with cream triangles to fill the edges and a pretty blue floral border.
The prints are soft vintage colors: denim blue, sage, chocolate brown and tan with tiny flowers. Because the squares are big, it is a great way to show off a fabric you love.
Quilt size and what it is made of
All measurements include a ¼-inch seam allowance unless they say finished. Quilts set on point have measurements with odd decimals, so sizes are given to the nearest half inch.
| Part | Size | How many |
|---|---|---|
| Finished quilt | about 50½ × 59 in | 1 |
| Print squares | 6½ in (6 in finished) | 30 |
| Cream squares | 6½ in (6 in finished) | 20 |
| Side setting triangles | from 9¾ in squares cut twice | 18 |
| Corner triangles | from 5⅛ in squares cut once | 4 |
| Blue border | 4 in finished | 4 strips |
Fabric and supplies
Pick a cream that is clearly lighter than all the prints.
- Prints: 5 fat quarters (6 squares from each)
- Cream: 1⅓ yards
- Blue floral: ¾ yard
- Binding: ½ yard
- Backing: 3½ yards
- Batting: 59 × 67 inches
Step 1: Cut the pieces
Cut the 9¾-inch squares twice from corner to corner (an X) to make 4 side triangles each. Cut the 5⅛-inch squares once to make 2 corner triangles each.
| Fabric | Cut | How many |
|---|---|---|
| Prints | 6½ in squares | 30 |
| Cream | 6½ in squares | 20 |
| Cream | 9¾ in squares, cut twice | 5 (20 triangles, 18 needed) |
| Cream | 5⅛ in squares, cut once | 2 (4 triangles) |
| Blue floral | 4½ in strips | 6 |
| Binding | 2½ in strips | 6 |
Step 2: Lay out the quilt on point
On a floor or design wall, lay out the print squares on point in 6 rows of 5, like diamonds. Put a cream square in every space between four print diamonds (20 cream squares). Fill the gaps along the edges with side triangles, and put a corner triangle in each corner.
Step 3: Sew the diagonal rows
Now look at the layout from one corner: it is made of diagonal rows. Sew each diagonal row together, starting and ending with a side triangle (the rows at two corners also get a corner triangle).
Press the seams of each row in the opposite direction from the row before. Join the rows, pinning where the seams meet.
Step 4: Trim the edges
Lay the top flat and trim all four sides, leaving ¼ inch beyond the corners of the squares. The center measures about 43 × 51½ inches.
Step 5: Add the blue border
Join the floral strips end to end. Measure the quilt through the middle and sew strips to the sides, then to the top and bottom. The top measures about 51 × 59½ inches.
Step 6: Quilt and bind
Cut the backing into two pieces 63 inches long and sew them together. Layer, baste and quilt: lines through the diamonds or a soft flower in each cream square both look lovely.
Join the 6 binding strips and bind.
Fixing common problems
On-point quilts are easier than they look with these checks.
- Wavy edges: handle the setting triangles gently and press, do not iron.
- Rows do not line up: pin at every seam and check each row against your photo.
- Edges uneven after sewing: that is normal; the trim in step 4 makes them straight.
- Corners cut off: leave ¼ inch beyond every square corner when trimming.
Final thoughts
Try it with red and green prints for Christmas, or soft pinks and lilacs for a baby. Want more cozy projects with every measurement worked out? Our printable PDF patterns are waiting in our Etsy shop, and our free guides are always here.