Scrappy half-square triangle quilt: colorful diamonds and a pieced border (45 × 55 inches)
🖨️ Prefer to sew from paper? Printable PDF patterns are in our Etsy shop ↗
Eighty scrappy half-square triangles turned into colored and white diamonds, finished with a border of little squares. Finished size 45 × 55 inches.
Complete guide · No signup required
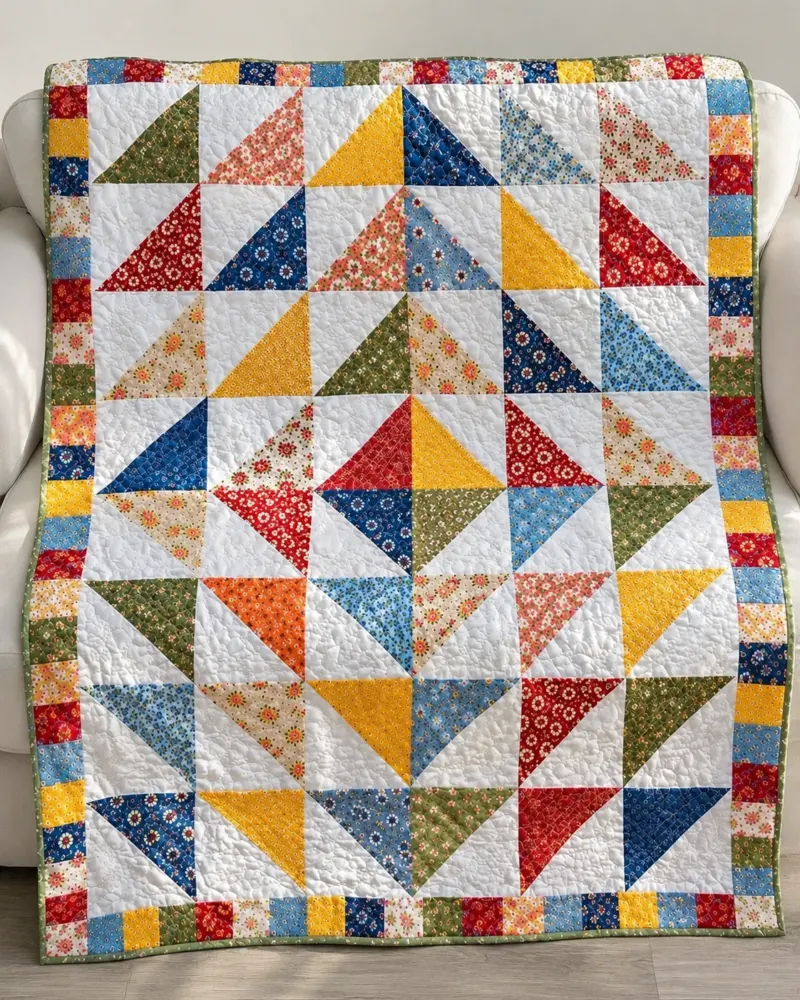
One unit, lots of diamonds
This bright quilt is made from just one unit: a square that is half print and half white. Turn four of them so the prints point to the middle and you get a colored diamond. Turn them the other way and a white diamond appears instead.
Mustard, red, blue, green, orange and little calicos make it cheerful, and a border of tiny scrappy squares finishes it like a frame. It is a great way to use up a stack of fat quarters.
Quilt size and what it is made of
All measurements include a ¼-inch seam allowance unless they say finished.
| Part | Size | How many |
|---|---|---|
| Finished quilt | 45 × 55 in | 1 |
| Half-square triangles | 5½ in (5 in finished) | 80 |
| Groups of four | 10 in finished | 20 |
| Border squares | 3 in (2½ in finished) | 76 |
Fabric and supplies
Use prints that are clearly darker than the white, so every triangle shows.
- Prints: 8 fat quarters or about 60 scraps at least 6 inches square
- White: 1⅛ yards
- Green binding: ½ yard
- Backing: 3 yards
- Batting: 53 × 63 inches
Step 1: Cut the squares
From the prints, cut 40 squares 6 inches for the triangles and 76 squares 3 inches for the border (a 6-inch scrap gives four 3-inch squares).
From the white, cut 6 strips 6 inches wide and cut them into 40 squares 6 inches.
Step 2: Make 80 half-square triangles
Draw a line from corner to corner on the back of each white square. Place it on a print square, right sides together. Sew ¼ inch on both sides of the line, cut on the line and press toward the print.
Each pair gives two units. Trim all 80 to 5½ inches, keeping the diagonal seam exactly in the corners.
Step 3: Make 20 groups of four
Diamond group: sew four units so the prints point to the center. Make 10.
White group: sew four units so the prints point to the outside corners. Make 10. Each group measures 10½ inches.
Step 4: Join the groups
Lay out 5 rows of 4 groups. Diamond and white groups take turns like a checkerboard, starting with a diamond group in the top left corner. Where groups meet, more diamonds appear.
Sew the groups into rows and join the rows, pinning where the points meet. The center measures 40½ × 50½ inches.
Step 5: Add the pieced border
Sew two strips of 20 squares for the sides and sew them on. Sew two strips of 18 squares for the top and bottom and sew them on.
Step 6: Quilt and bind
Cut the backing into two pieces 53 inches long and sew them together. Layer, baste and quilt: an all-over meander or straight lines through the diamonds both look great.
Cut 6 green strips 2½ inches wide, join them and bind.
Fixing common problems
Triangles are easy with these checks.
- Points cut off: trim the units with the diagonal line of your ruler on the seam.
- Units smaller than 5½ inches: start with 6¼-inch squares next time.
- Border does not fit: adjust a few border seams before sewing it on.
- Diamonds look uneven: spread the darkest prints around the quilt.
Final thoughts
In red and white it becomes a striking Christmas quilt; in pastels, a sweet baby quilt. Want more cozy projects with every measurement worked out? Our printable PDF patterns are waiting in our Etsy shop, and our free guides are always here.