Patchwork Christmas tree wall hanging: one scrappy tree in six easy rows (31 × 31 inches)
🖨️ Prefer to sew from paper? Printable PDF patterns are in our Etsy shop ↗
A scrappy patchwork tree made of squares and half-square triangles, with a red border. Six rows, a trunk and a finished size of 31 × 31 inches.
Complete guide · No signup required
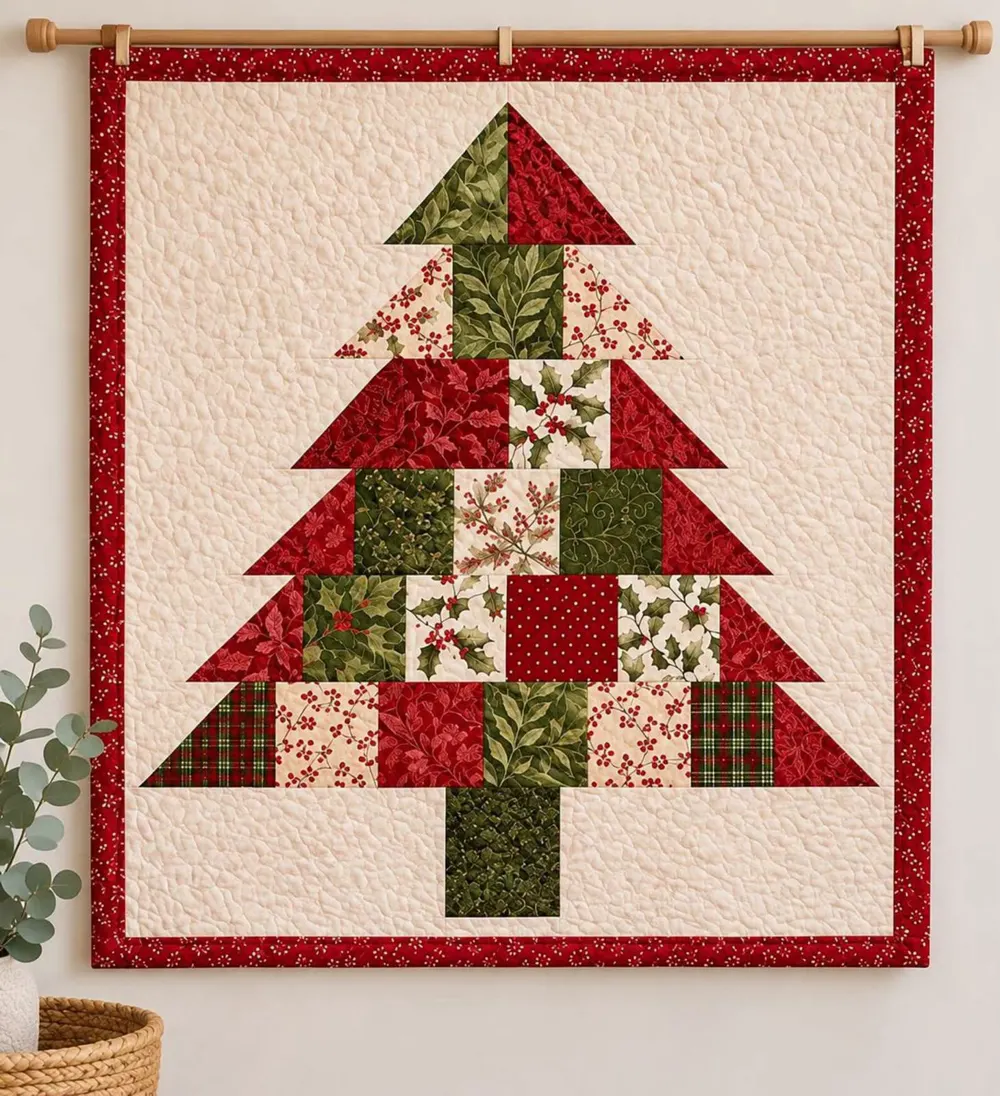
A tree for the wall, made of scraps
This little wall quilt is a happy way to use red and green Christmas scraps: holly, berries, plaids and polka dots all go into one patchwork tree. It hangs from a simple wooden rod and is just the right size for a door, a hallway or above the fireplace.
Every row is built the same way: a cream piece, a triangle, a few squares, another triangle and another cream piece.
Size and what it is made of
All measurements include a ¼-inch seam allowance unless they say finished.
| Part | Size | How many |
|---|---|---|
| Wall hanging | 31 × 31 in finished | 1 |
| Tree squares | 3½ in (3 in finished) | 15 |
| Half-square triangles | 3½ in (3 in finished) | 12 |
| Trunk | 3½ in square | 1 |
| Red border | 2 in finished | 4 strips |
Fabric and supplies
Pick prints with plenty of contrast against the cream.
- Red and green Christmas prints: 15 squares 3½ inches and 6 squares 4 inches (fat eighths or scraps)
- Trunk: 1 square 3½ inches in dark green or brown
- Cream: ⅝ yard
- Red border: ⅓ yard
- Binding: ⅓ yard
- Backing: 1 yard
- Batting: 35 × 35 inches
- A wooden rod about 32 inches long for hanging
Step 1: Cut the pieces
Cream: 2 strips 3½ × 27½ inches (top and bottom), 2 pieces 3½ × 12½ inches (trunk row), 6 squares 4 inches, and two of each side piece in the table below (all 3½ inches tall).
Prints: 15 squares 3½ inches, 6 squares 4 inches and the trunk square.
| Row | Cream side pieces (cut 2, 3½ in tall) | Middle of the row |
|---|---|---|
| Row 1 | 11 in | 2 triangles, no squares |
| Row 2 | 9½ in | 1 square |
| Row 3 | 8 in | 2 squares |
| Row 4 | 6½ in | 3 squares |
| Row 5 | 5 in | 4 squares |
| Row 6 | 3½ in | 5 squares |
| Trunk row | 12½ in | 1 trunk square |
Step 2: Make 12 half-square triangles
Pair each 4-inch print square with a 4-inch cream square, right sides together. Draw a diagonal line, sew ¼ inch on both sides, cut on the line and press. Trim each triangle square to 3½ inches. Each pair gives the two end triangles of one row.
Step 3: Build the rows
For each row, sew: cream side piece, triangle (print in the lower right), the print squares, triangle (print in the lower left), cream side piece. Every row measures 3½ × 27½ inches.
The trunk row is a cream piece, the trunk square and another cream piece.
Step 4: Put the tree together
Sew the rows in order: cream strip, rows 1 to 6, trunk row, cream strip. Match the center creases and pin. The center measures 27½ × 27½ inches.
Step 5: Add the border
Cut 3 red strips 2½ inches wide. Sew 2½ × 27½-inch strips to the sides, then 2½ × 31½-inch strips to the top and bottom. The piece measures 31½ inches square.
Step 6: Quilt, hang and bind
Layer, baste and quilt: an all-over stipple, like in the photo, makes the tree pop. Before binding, fold two 6-inch squares in half into triangles and baste them to the top back corners: they hold the rod.
Cut 4 binding strips 2½ inches wide, join them and bind.
Fixing common problems
Small quilts show small mistakes, so take your time.
- The tree leans: match the center creases of every row.
- Rows of different lengths: check each row against 27½ inches and trim the cream ends evenly.
- Triangle points cut off: trim the half-square triangles before sewing them into rows.
- It does not hang flat: quilt evenly across the whole piece and press before binding.
Final thoughts
Make one in red and green, another in blue and silver for winter. Want more cozy projects with every measurement worked out? Our printable PDF patterns are waiting in our Etsy shop, and our free guides are always here.