Scrappy brick table runner: 36 pieces, two easy rows and a narrow navy border (16 × 38 inches)
🖨️ Prefer to sew from paper? Printable PDF patterns are in our Etsy shop ↗
An easy table runner made from 18 print strips and 18 navy pieces. One simple unit, no points to match and a finished size of 16 × 38 inches.
Complete guide · No signup required
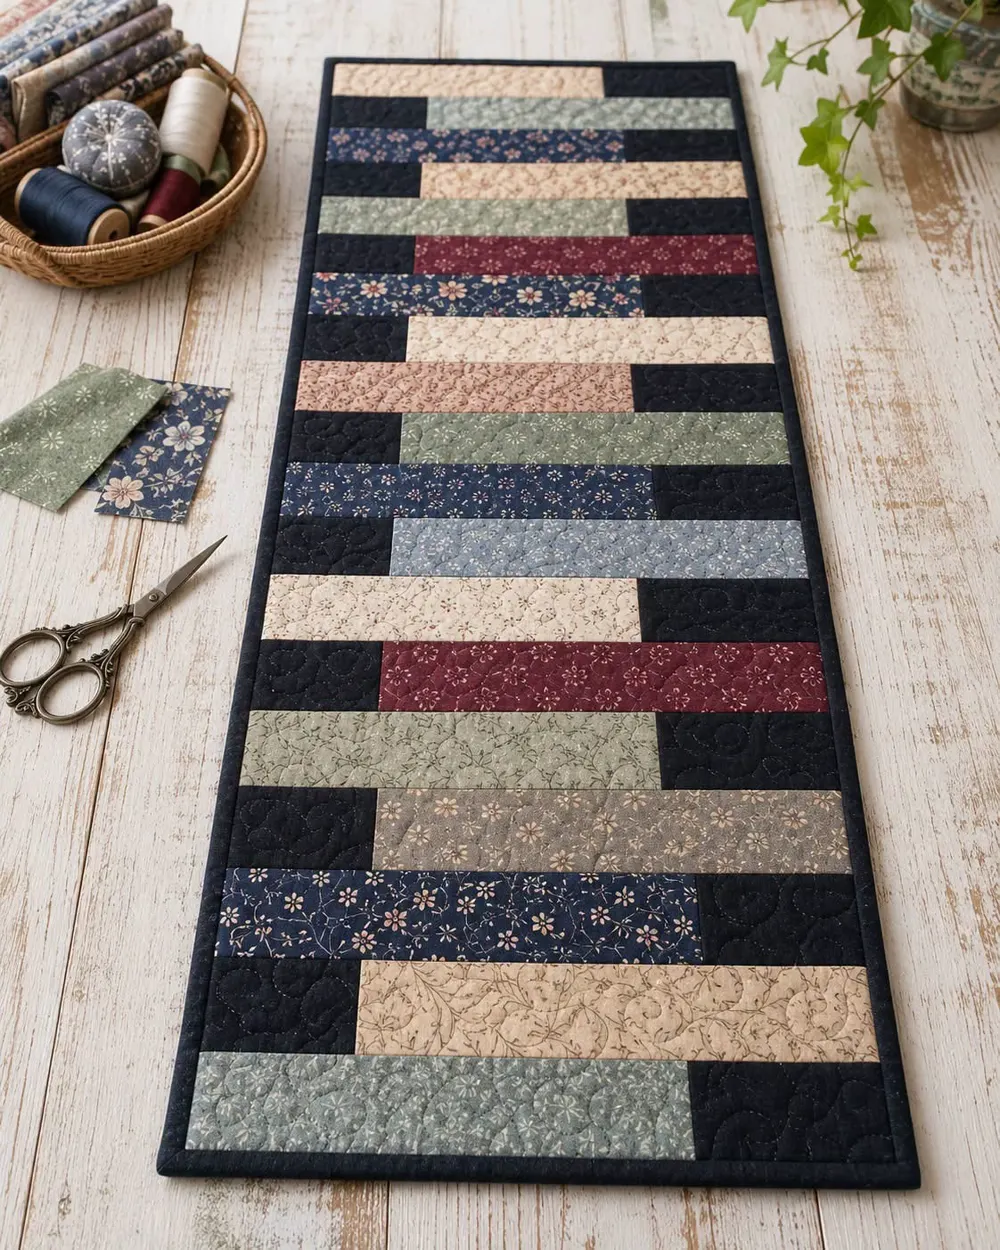
A runner for your favorite scraps
This runner is made of eighteen rows. Every row is one long print strip and one short navy piece, and the navy simply jumps from one side to the other as the rows go down. The result looks like a little stack of bricks in a dark frame.
There are no triangles and no points to match, so it is a lovely first project and a quick gift. It is also the perfect place for those pretty strips you could never throw away: blues, sage greens, creams, a little burgundy and a dusty rose all live happily together against navy.
Runner size and what it is made of
All measurements are in inches and include a ¼-inch seam allowance unless they say finished.
| Part | Size | How many |
|---|---|---|
| Finished runner | 16 × 38 in | 1 |
| Rows | 2 × 14 in finished | 18 |
| Print strips | 2½ × 10½ in | 18 |
| Navy pieces | 2½ × 4½ in | 18 |
| Navy border | 1 in finished | 4 strips |
Fabric and supplies
Choose prints that are clearly lighter or brighter than the navy so every brick shows.
- Prints: 18 different strips, each at least 2½ × 10½ inches (scraps, jelly roll strips or fat eighths)
- Navy: ⅝ yard (rows, border and binding)
- Backing: ⅝ yard (a piece about 20 × 42 inches)
- Batting: 20 × 42 inches
- Neutral thread, rotary cutter, ruler and mat
Step 1: Cut the pieces
From the navy, cut 2 strips 2½ inches × the width of the fabric and cut them into 18 pieces 2½ × 4½ inches (9 from each strip). Cut 3 more strips 1½ inches wide for the border and 3 strips 2½ inches wide for the binding.
From the prints, cut 18 strips 2½ × 10½ inches.
Step 2: Sew 18 rows
Sew each print strip to a navy piece along the short 2½-inch ends, right sides together. Press the seam toward the navy.
Every row should measure 2½ × 14½ inches. Here is the nice part: you only make one kind of row. Turn a row around and the navy is on the other side, so row A and row B are the same unit facing opposite ways.
Step 3: Join the rows
Lay the rows out on a table or the floor: row A (navy on the right), row B (navy on the left), and so on, nine of each. Move them around until no two similar prints touch.
Sew the rows together along their long edges, pinning at both ends and in the middle. Press all the seams in one direction. The center should measure 14½ × 36½ inches.
Step 4: Add the navy border
Measure the length through the middle of the runner and cut 2 border strips 1½ inches wide to that length (about 36½ inches). Sew them to the long sides and press toward the border.
Measure the width through the middle (about 16½ inches), cut 2 more strips and sew them to the short ends. The runner now measures 16½ × 38½ inches, which finishes at 16 × 38 inches.
Step 5: Quilt and bind
Layer the backing (right side down), the batting and the runner top (right side up) and baste. Straight lines along every row seam are quick and look great; a soft swirl, like the one in the photo, is lovely too.
Join the 3 binding strips into one long strip (you need about 120 inches), press it in half and sew it around the edge with mitered corners.
Fixing common problems
Most runner problems are small and easy to fix.
- Rows of different lengths: square them to 14½ inches before joining, trimming from the print end.
- The runner bows in the middle: press, do not iron back and forth, and pin each row at both ends before sewing.
- Wavy border: always measure through the middle, not along the edge.
- Navy shows through a light print: press that seam toward the print instead.
Final thoughts
Make one for the dining table and another for the coffee table. In red and green it is ready for Christmas, in blues and creams it stays out all year. Want more cozy projects with every measurement worked out? Our printable PDF patterns are waiting in our Etsy shop, and our free guides are always here.