How to sew the Sunshine & Indigo brick quilt, step by step
A gentle, detailed walk-through of our free blue-and-yellow brick quilt: reading the row plan, cutting six brick lengths, sorting, sewing twenty rows and finishing a 48 × 60-inch throw.
Complete guide · No signup required
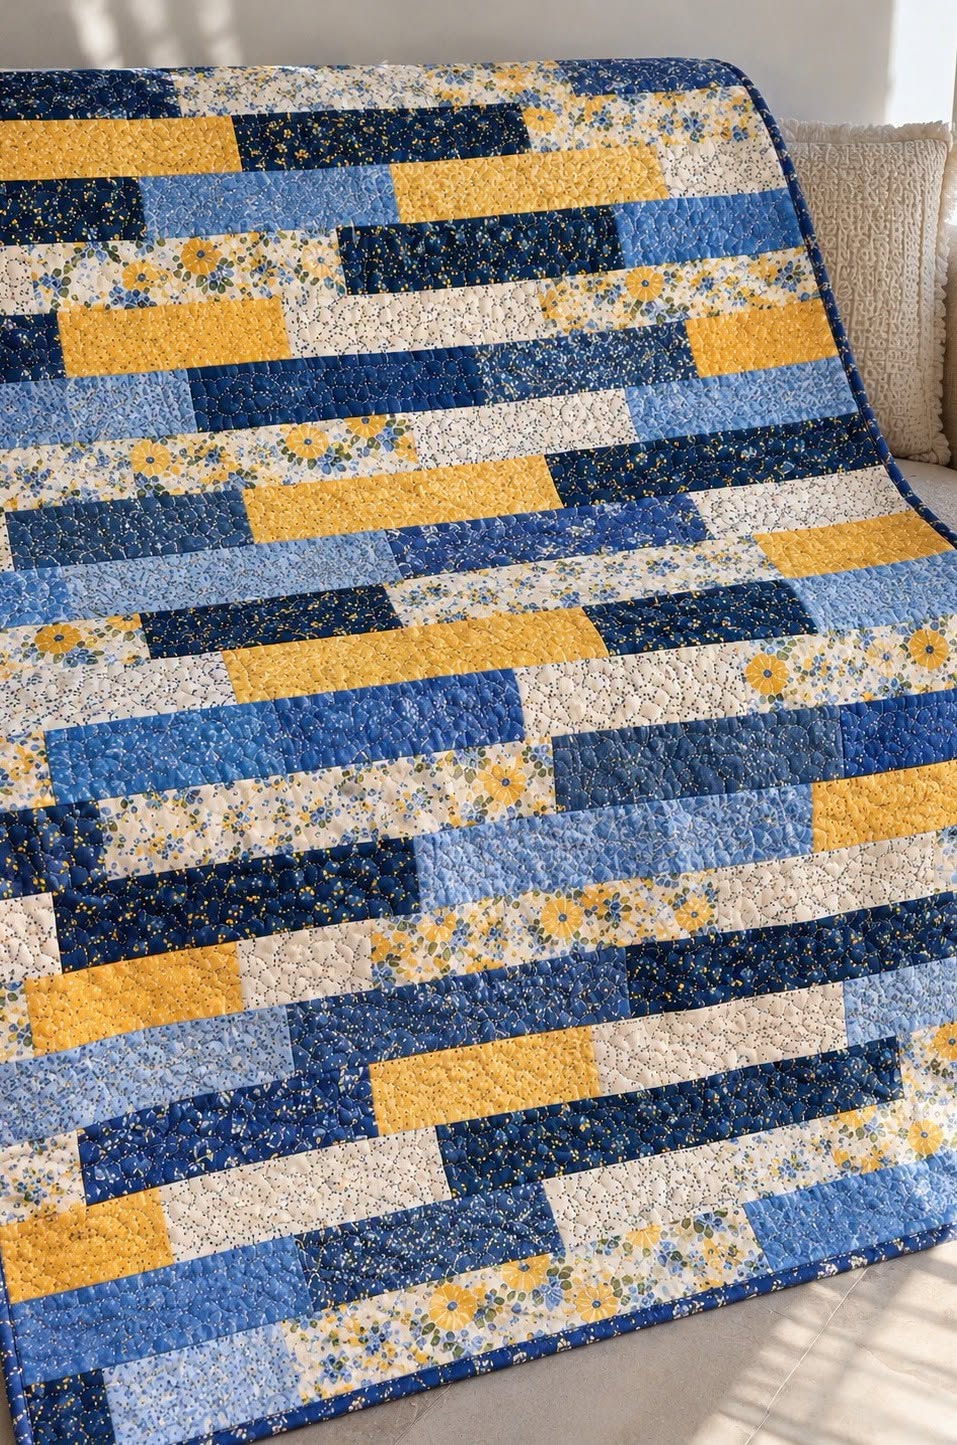
Sunshine yellow, cornflower blue and deep navy
Some color combinations just feel happy, and golden yellow with blue is one of them. The Sunshine & Indigo quilt pairs those colors with soft cream florals in long horizontal bricks. From across the room it looks like stripes of sunlight on a summer porch; up close, every brick shows off a different little print.
The free pattern PDF has all the numbers: a cutting chart, a plan for all twenty rows and finishing instructions. This tutorial walks beside the PDF, step by step, explaining how to read the plan, how to stay organized and how to check your work as you go. Keep the PDF open or printed next to you while you read.
What makes this quilt easy
Every piece is a rectangle, and every rectangle is 3½ inches tall. Only the length changes. There are no triangles and no blocks. You sew pieces end to end into long rows, and then sew the rows together.
Because each row is put together differently, the seams fall in different places from one row to the next. That gives the staggered brick look, and it also means you almost never have to match a seam with the row above. If matching seams has ever made you nervous, this quilt is a relaxing place to start.
Words used in this tutorial
Here are the few terms you will meet. Come back to this list whenever you need it.
- Cut size: the size you cut with the rotary cutter. All sizes in the pattern are cut sizes and already include the seam allowance.
- Seam allowance: always ¼ inch in quilting. Each seam uses up ½ inch of length in total (¼ inch from each piece).
- Color codes: C = cream, Y = yellow, N = navy, B = light or medium blue. Use several different prints in each color family.
- WOF (width of fabric): a strip cut from one folded edge of the fabric to the other.
- Row plan: the list in the PDF that tells you which pieces go into each row, from left to right.
Size and supplies
The quilt finishes at 48 × 60 inches. It has twenty rows and 89 bricks. These are the amounts from the pattern, which assume at least 40 usable inches of fabric width.
- Rotary cutter, mat and a long ruler (24 inches is ideal for the long bricks)
- Neutral thread, pins or clips, iron and sewing machine
- Small zip bags or paper plates, a marker and some sticky notes for labels
| Fabric | Amount | Notes |
|---|---|---|
| Cream / ivory florals (C) | 1½ yd | several prints |
| Golden yellow prints (Y) | 1 yd | several prints |
| Navy prints (N) | ⅝ yd | several prints |
| Light / medium blue prints (B) | ¾ yd | several prints |
| Binding (navy) | ⅝ yd | seven 2¼-in strips |
| Backing / batting | 4¼ yd / 56 × 68 in |
Step 1: Get to know the six brick lengths
Every brick is 3½ inches tall, and there are only six lengths: 3½, 6½, 9½, 12½, 15½ and 18½ inches. Notice that they go up by 3 inches each time. Once sewn, each brick is ½ inch shorter than its cut size, so they finish at 3, 6, 9, 12, 15 and 18 inches.
The cutting chart in the PDF tells you how many bricks of each length to cut from each color. For example, the cream row of the chart says 1 of 3½, 14 of 6½, 8 of 9½, 11 of 12½, 4 of 15½ and 3 of 18½ inches.
Step 2: Cut the bricks, longest first
Cut 3½-inch strips across the width of each fabric. Then cut the bricks from the strips, starting with the longest ones. Long pieces need long stretches of strip, so cut the 18½- and 15½-inch bricks first, and fill the leftover ends with shorter bricks.
Cut one color family at a time. When a family is done, count each length against the chart before moving on. It is much easier to cut one more brick now than to discover a missing piece in row 17.
- Cut a few strips of one color.
- Cut the 18½-inch bricks, then 15½, then 12½, and so on down to the shortest.
- Count each length and compare with the chart.
- Repeat for the next color family.
Step 3: Sort and label everything
This is the step that makes the rest of the quilt calm. Make one stack, zip bag or paper plate for each color and length, and label it, for example "Y 12½" or "C 6½". With 89 pieces in six lengths, many bricks look alike; labels prevent mix-ups.
When you are ready to sew a row, take its pieces from the stacks in the order the plan lists them, and lay them out left to right on a table. Pin a small paper with the row number to the first piece.
Step 4: Test your seam allowance
Before sewing the quilt, sew two scrap rectangles end to end with a ¼-inch seam and measure. Two 6½-inch pieces should make 12½ inches. If your test is shorter, your seam is a little too wide; if it is longer, a little too narrow. Adjust and test again.
This small test matters because each row has two to five seams. A seam that is only a little too wide, repeated across a row, adds up and makes that row shorter than its neighbors.
Step 5: Sew the first row
Row 1 in the plan reads: C 6½ | N 9½ | C 9½ | Y 12½ | C 12½. Sew the first two pieces together along their short 3½-inch ends, right sides together. Then add the third piece to the right end, then the fourth, and so on.
Press each seam toward the darker fabric, lifting and lowering the iron. Measure the finished row. Every row in this quilt measures 48½ inches long. If it is within about ⅛ inch, it is fine; if it is more, look for a seam that wandered.
Step 6: Sew the other nineteen rows
Work through the plan one row at a time, in the same way. Row 2 has only three pieces, while row 7 and row 8 have six. In row 8, two cream pieces sit next to each other; use two different cream prints there so they still read as separate bricks.
After each row, measure it, pin its number label to the left end and lay it on a flat surface in order. Twenty rows are a lot to make in one sitting, so do five rows at a time and take a break between sets.
- Always read the row from left to right.
- Measure every row: 48½ inches.
- Keep the paper number on the left end until the row is sewn into the quilt.
Step 7: Join the rows
Lay all twenty rows out in order, row 1 at the top. Place row 2 on row 1, right sides together, matching the ends. Pin at both ends, in the middle and every four or five inches. If two seams happen to land at the same place, nest them so they lock together.
Join the rows in pairs (1 and 2, 3 and 4, and so on), then join the pairs into larger sections, and finally join the sections. Shorter pieces are easier to handle under the machine. Press the long seams open or all in one direction.
Step 8: Check the quilt top
The finished top measures about 48½ × 60½ inches. Measure across the top, the middle and the bottom; the three numbers should be nearly the same. Twenty rows, each 3½ inches cut and 3 inches finished, give the 60-inch length.
Step 9: Quilt and bind
Layer the backing, batting and top, and baste. Simple horizontal lines that follow the bricks look lovely and are easy with a walking foot. A loose all-over meander is another good choice.
For the binding, cut seven strips 2¼ inches wide across the width of the navy fabric. That gives about 280 inches, comfortably more than the 228 inches needed for the 216-inch edge plus joins and corners. Join the strips, press in half and sew to the quilt.
Fixing common problems
A few small things can happen in a brick quilt. Each one has an easy fix.
- A row is too short: measure each brick in it; one seam is probably wider than ¼ inch. Unpick and resew just that seam.
- Two similar prints touch: swap a brick with one of the same length and color from another row before sewing.
- Rows wave when joined: the long seam stretched. Pin more often and do not pull the fabric.
- A piece was cut too short: cut a new brick from the same color; you have extra fabric for exactly this.
Final thoughts
The Sunshine & Indigo quilt is mostly about patience and organization, not difficult sewing. Sort your bricks, label your rows, test your seam and measure as you go, and the quilt will come together beautifully. Download the free PDF from the pattern page to keep the full row plan and cutting chart beside your machine, and follow Cozy Pattern Lane on Facebook and Instagram (@cozypatternlane) for more quilting ideas.